7 - Demoing your extensions
7 - Demoing your extensions
Selecting the automatic renewal option in the Storefront
After you modify the velocity templates to support the automatic renewal, your customers can sign up for the automatic renewal as they checkout in the Storefront.
- Start the web applications as shown in 2. Run Storefront.
- Go to the SnapItUp store's home page: http://demo.elasticpath.com:8080/storefront/
- Click the Tutorials tab.Note:
If you don't see any products after clicking the Tutorials tab, try rebuilding the Product Search Index in the Commerce Manager Client.
- Select the Snap It Up Tutorial Plan.
- Click Add to Cart.
- Click Checkout.
- Under I HAVE an account, log in as the following user:
Email Address alana.abercombie@elasticpath.com Password password - Under Payment Information, click Renew my subscription automatically and bill me.
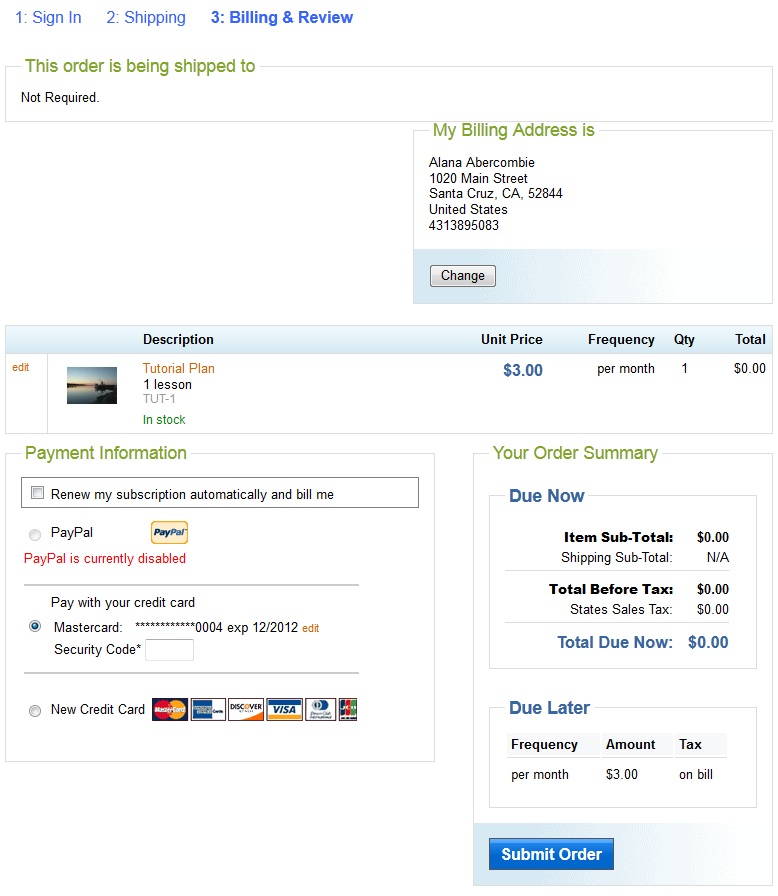
- This signs you up for the automatic renewal.
- Under Payment Information, enter the following security code and click Submit Order.
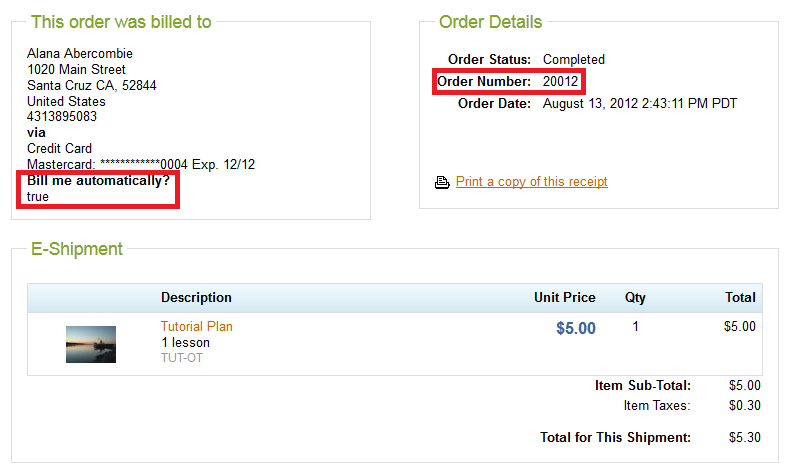
Security Code 111 - Under Order Details, remember the Order Number since you'll need it to view the order in the Commerce Manager Client.
 Note:
Note:You may see the following message after you submit your order:

This message appears when:
- Elastic Path is not assigned an SMTP server. To assign an SMTP server to Elastic Path, set the COMMERCE/SYSTEM/EMAIL/mailHost setting to your SMTP server's host name.
- The email account being mailed does not exist. To view the order confirmation email, create an order with a customer account that has an existing email address.
For this tutorial, you can ignore this message.
Viewing an order's automatic renewal option in the Commerce Manager Client
Once your Commerce Manager Client is configured to use your extended OrderEditor, your customer sales representatives can examine the order to view whether a customer has signed up for automatic renewal.
Running the Commerce Manager Client in Eclipse
In this tutorial, we run the Commerce Manager Client from within Eclipse. If you want to run the extended Commerce Manager Client outside of Eclipse, you will have to convert your com.extensions.cmclient.order plugin into a Maven project and wrap it up in a feature.
- With the command line, navigate to <Source Code Root>\extensions \cmserver\ext-cmserver-webapp, and run the following command to start up the Commerce Manager server:
mvn tomcat7:run-war
- In Eclipse, right-click on com.elasticpath.cmclient.core/commercemanager.product and select Run As->Run Configurations....
- In the Launch Configurations list, select Eclipse Application->commercemanager.product
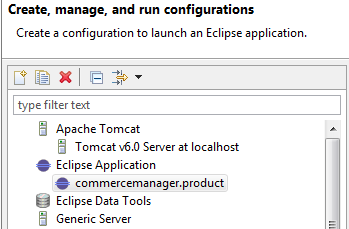
- Under Program to Run in the Main tab, make sure Run a product and com.elasticpath.cmclient.core.product are selected.
- Click the Plug-ins tab.
- In the Plug-ins list, select com.extensions.cmclient.order (1.0.0.qualifier) to include your extended OrderEditor in the Client's startup.
- Click Run.
Viewing the Order
- Log in to the Commerce Manager Client.
- Choose Activity -> Customer Service.
- In the Customer Service Search tab, click Orders.
- Under Order Number:, enter the Order Number you got from the Storefront and click Search.
- In the Order Search Results tab, open your order.
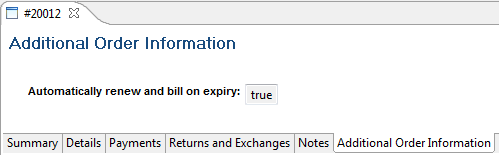
- In the Order Details window, click the Additional Order Information tab.