Adding a Feature to the Commerce Manager Client
Adding a Feature to the Commerce Manager Client
This section explains how to add a plugin to the Commerce Manager Client after it has been wrapped up in an Eclipse feature project.
Note:
The Commerce Manager Client is composed of features, which are collections of plugins. If you want to add a plugin to the Commerce Manager Client, the plugin must be part of a feature.
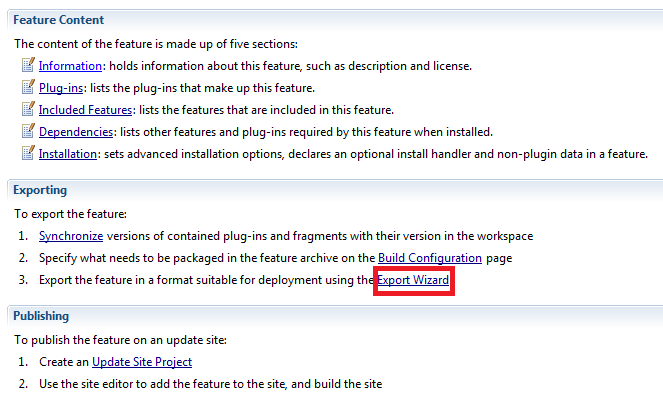
- In the Eclipse package Explorer, open your feature project's feature.xml
- In the Overview tab, click on Export Wizard
- Under Available Features, select your feature project
- Under Directory, set your output directory.
- In your output directory, go into both the plugin and features folders and rename the JAR file inside as per the maven standard, i.e. <artifactId>-<version>-<qualifier> .jar, e.g. org.eclipse.equinox.executable.feature-3.3.0-v20070524-7C--E9IgKLWL8bB.jar. Typically, this is slightly different to how eclipse would have named the jar. For example, eclipse may have a . or _ between the parts instead.Note:
The feature artifact should have .feature appended to distinguish it from a related plugin.
- Deploy both JAR files to your Maven repository.Note:
How you deploy your JAR files to your Maven repository depends on your company's Maven setup. Contact your release engineering group for information on deploying JAR files to your Maven repository.
- In cmclient\product\pom.xml, add a dependency section for your new feature as follows, with the groupId, artifactId and version set to match the previous step
<dependency>
  <groupId>org.eclipse.equinox</groupId>
  <artifactId>org.eclipse.equinox.executable.feature</artifactId>
  <version>3.3.0-v20070524-7C--E9IgKLWL8bB</version>
</dependency>
- In <Elastic Path root>\cmclient\product\commercemanager.product, edit the file for your new feature as follows, with the feature id and version number matching the feature JAR file.
<features>
      <feature id="org.eclipse.equinox.executable.feature" version="3.3.0"/commerce-legacy/>
</features>


