Nexus Setup
Nexus Setup
Overview
The DevOps Automation Accelerator Kit provides a script to install and configure a Nexus repository on a clean server that has been provisioned according to Prepare Infrastructure (Maven).
For a copy of the DevOps Automation accelerator, see Download Prerequisites.
Configure Nexus setup script
- Unzip the DevOps Automation accelerator kit to a local drive.
- Configure the property values in nexus-setup/nexus.properties.
Property Description Example jdk_home The path to the JDK directory /opt/jdk1.7.0_51 project_id Used to construct the internal id for project repositories and groups. – Should be lowercase. – Do not include "ep" in your project id. This is added automatically. my-project project_name Used to construct the display name for project repositories and groups. -- Do not include "EP" in your project name. This is added automatically. Project"My Project" system_sender_email The sender email address for messages sent by Nexus nexus@company.com admin_email The email address of the admin user. Used for password recovery. admin-user@company.com maven_deployer_email The email address of the maven deployer user. This is the user that has "Artifact Upload" permissions and is used by Jenkins to upload artifacts. maven-deployer@company.com smtp_host The SMTP host used to send email. smtp@company.com smtp_port The SMTP port 25
Run setup script
- Login to the server using the account created during server provisioning.
- Copy the nexus-setup directory from the DevOps Automation project to your home directory on the server
- Execute the following commands:
cd ~/nexus-setup
chmod u+x setup-nexus.sh
./setup-nexus.sh
- Open the Nexus control panel at http://<server-host>:8081/nexus/
- Login as administrator with username admin and password admin123
Set credentials for EP repositories
Access to the EP repositories require a valid username and password from Elastic Path. See Starting Construction Guide (Prerequisites) for more information.
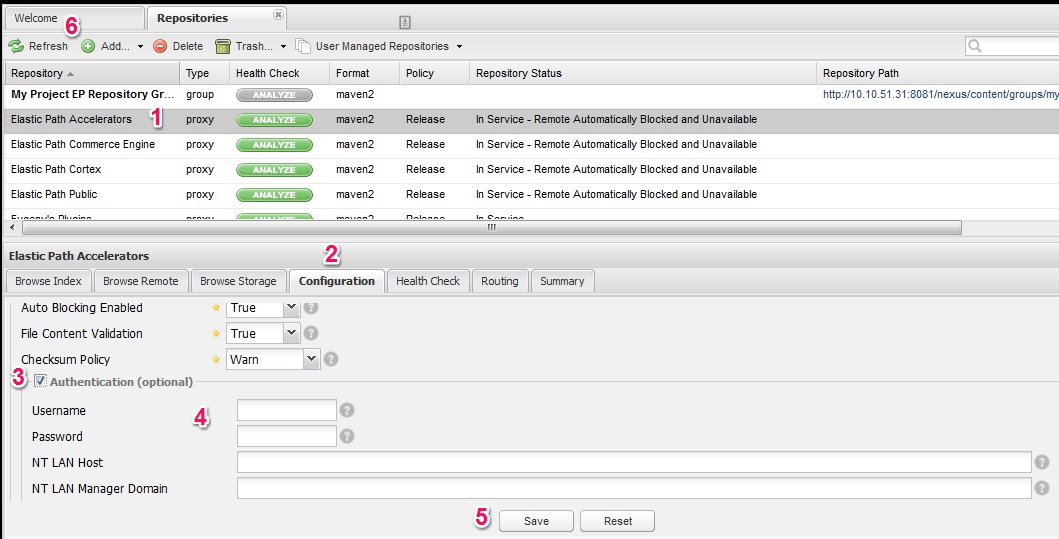
When Nexus starts, click "Repositories". You will see that the EP repositories have a status of "In Service - Remote Automatically Blocked and Unavailable".

You will need to manually enter the username and password for each repository.
The steps are:
- Select the repository from the Repositories list.
- Click the Configuration tab
- Click the Authentication (optional) box. This will expand the panel containing Username and Password.
- Enter the Username and Password provided by Elastic Path
- Click the Save button
- Click the Refresh button. The repository status will change to "In Service" if the entered credentials are valid.

Configure a local AEM proxy
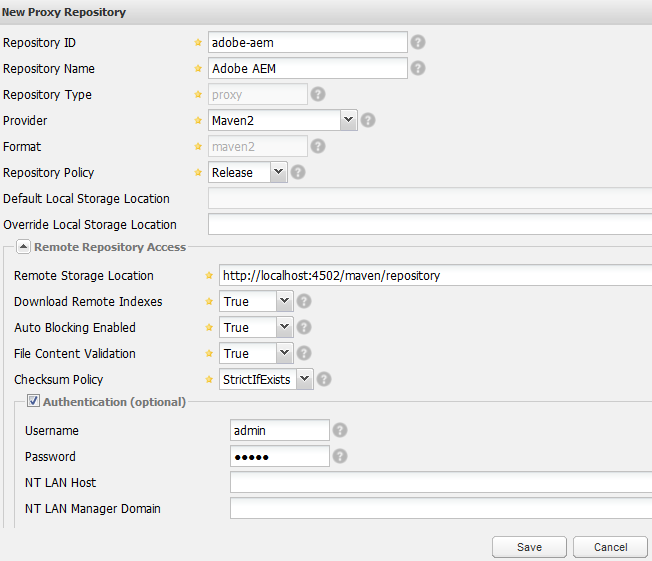
- Follow the instructions at Configure Adobe AEM as a Maven repository.
- Add a Nexus proxy for the local AEM repository:
3. Add the Adobe AEM proxy to the bottom of the External Proxy Repository Group.
Configure and test SMTP
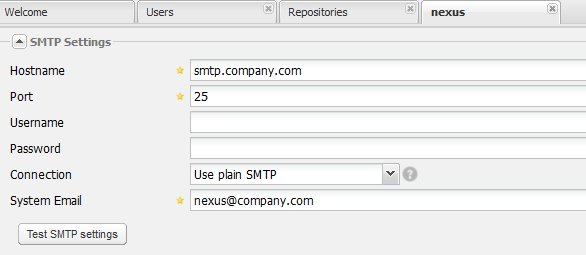
Navigate to http://<server-host>:8081/nexus/#nexus-config to enter additional configuration required by your SMTP server and to test SMTP connectivity.

Upload MySQL driver
Obtain the driver as described by Setup Maven Repository. To upload the artifact:
- Select the <Project> EP Releases hosted repository.
- Follow the instructions at http://books.sonatype.com/nexus-book/reference/using-sect-uploading.html.


