4. Creating a Tomcat Server for the Commerce Engine
4. Creating a Tomcat Server for the Commerce Engine
The following instructions describe how to create a Tomcat Server in Eclipse for the extension Commerce Engine web applications, which are:
- ext-cmserver-webapp
- ext-search-webapp
- ext-integration-webapp
- activemq-broker
Note: Before You Begin
Make sure you have the wtp-developer profile activated in your Maven settings.xml file. If wtp-developer is not active, activate the wtp-developer profile and rebuild your project by running mvn clean install in your Elastic Path root directory. You must do the rebuild in order to apply changes made to settings.xml.
Creating a Tomcat Server in Eclipse for the Commerce Engine Web Apps
- In Eclipse, choose File -> New -> Other.
- In the list of wizards, select Server -> Server and click Next.
- In the server type list, expand Apache, select Tomcat 7.0 and click Next.
- Click Browse and locate the your root Tomcat directory.
- In the JRE drop-down list, select jdk1.8.0_66 and click Next.
- Select ext-cmserver-webapp, ext-search-webapp, and ext-integration-webapp, activemq-broker and click Add.Note:
Ensure there is only one of each webapp present. For example, if you select the extension storefront, make sure you don't select ep-storefront from the list.
- Click Finish.
Configuring the Tomcat Server
- In Eclipse, choose Window -> Show View -> Other.
- Select Server -> Servers and click OK.
- Click the Servers tab.
- In the Servers tab, double-click the server you just created to display the server's Overview tab.
- Expand Timeouts, set Start to 300.
- Under Server Locations, make sure Use workspace metadata is selected
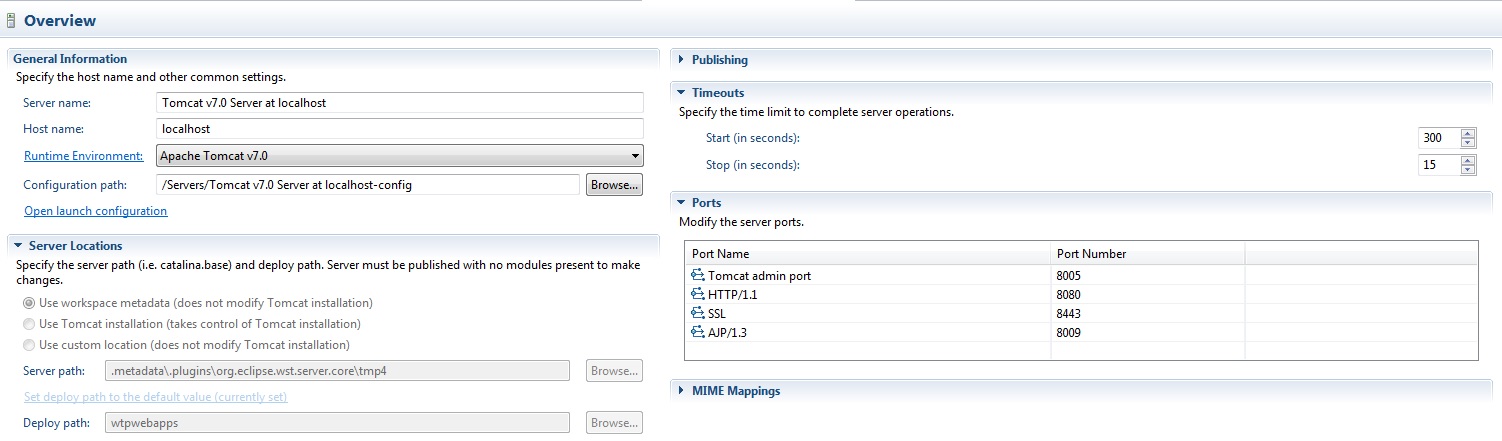
- Under General Information, click Open launch configuration.
- Click the Arguments tab and add the following arguments to the end of the VM arguments.
-Xmx1024m -Dsun.lang.ClassLoader.allowArraySyntax=true -XX:CompileCommand=exclude,org/apache/velocity/runtime/directive/Foreach,render
Configure the Tomcat's context.xml
- In Eclipse's package explorer, open Servers\<Your Server Name>\context.xml
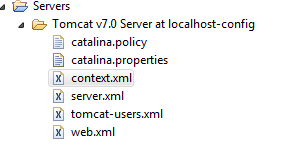
- In context.xml, insert the following code before the </Context> tag:
<Resource auth="Container" name="mail/Session" type="javax.mail.Session"/commerce-legacy/> <Resource name="jdbc/epjndi" auth="Container" scope="Shareable" type="javax.sql.DataSource" maxActive="100" maxIdle="30" maxWait="10000" removeAbandoned="true" username="USER" password="PASSWORD" driverClassName="DRIVER" url="JDBC_URL" /> <Resource auth="Container" name="jms/JMSConnectionFactory" type="org.apache.activemq.pool.PooledConnectionFactory" description="JMS Connection Factory" factory="org.apache.activemq.jndi.JNDIReferenceFactory" brokerURL="tcp://127.0.0.1:61616"/commerce-legacy/> - Replace USER and PASSWORD with the account information of an account that can access your database.
- Replace DRIVER with the JDBC Driver that corresponds to your DBMS and JDBC_URL with your Database Connection URL:
Database JDBC Driver Database Connection URL MySQL 5.1
com.mysql.jdbc.Driver
jdbc:mysql://HOSTNAME:PORT/DBNAME?AutoReconnect=true&useUnicode=true&characterEncoding=utf-8
For example:
<Resource auth="Container" name="mail/Session" type="javax.mail.Session"/commerce-legacy/> <Resource name="jdbc/epjndi" auth="Container" scope="Shareable" type="javax.sql.DataSource" maxActive="100" maxIdle="30" maxWait="10000" removeAbandoned="true" username="ep" password="ep" driverClassName="com.mysql.jdbc.Driver" url="jdbc:mysql://127.0.0.1:3306/COMMERCEDB?AutoReconnect=true&useUnicode=true&characterEncoding=utf-8" />
- In the Servers tab, right click your server, select Clean... and click OK.
- In the Servers tab, right click your server and select Publish.