MySQL to PostgreSQL Migration
Overview
As of Self-Managed Commerce 8.3, we now support PostgreSQL as a database option. Internal performance tests and production experience by our customers has shown a significant performance improvement with PostgreSQL RDS over MySQL. However, migrating your existing data from MySQL to PostgreSQL should be undertaken as a project that may take some time. It is recommended that you upgrade to Self-Managed Commerce 8.3 on MySQL first, and then perform this migration to PostgreSQL. This document describes our high-level advice for migrating.
note
We recommend use of PostgreSQL RDS over PostgreSQL Aurora. Our tests have shown that PostgreSQL Aurora does not have the same performance advantages as PostgreSQL RDS.
Step 1: Database Creation
The first step is to create an empty PostgreSQL database. Decide if you want to use AWS RDS or AWS Aurora. Make sure to setup the database in the same AWS account where your existing MySQL database resides. Follow the Amazon Web Services documentation for setup details.
Step 2: Schema Population
Use the Data Population tool to generate the new database schema in PostgreSQL. Use the tool with the reset-db command to create the schema. For more information, see the Data Population Tool documentation.
note
It's very important to use the exact same source code snapshot that was last used to update the MySQL production database to initialize the PostgreSQL database. If the Liquibase scripts are different, then problems can occur.
Step 3: Pre-Data Migration
The Data Population tool creates some initial records alongside the schema, so we need to erase existing data from the PostgreSQL database before starting the data migration. Amazon Database Migration Service has an option to truncate a table before the migration, but it can't be used in this case due to foreign key constraints. You will need to execute a truncate query with cascade option for each table, which can be done using the script below.
note
Be sure to change the tableowner and schemaname values before executing the script.
DO
$do$
BEGIN
    EXECUTE (
        SELECT 'TRUNCATE TABLE '
        || string_agg(format('%I.%I', schemaname, tablename), ', ')
        || ' RESTART IDENTITY CASCADE'
        FROM    pg_tables
        WHERE   tableowner = 'postgres'
        AND     schemaname = 'public'
        AND NOT tablename = 'databasechangelog'
    );
END
$do$;
Use pgAdmin to execute the script on the PostgreSQL database.
Step 4: Data Migration
For this step, we will use Amazon Database Migration Service to migrate the data from your MySQL database to the PostgreSQL database. Open Database Migration Service in your AWS console. Create a source endpoint for the MySQL database and target for the PostgreSQL database.
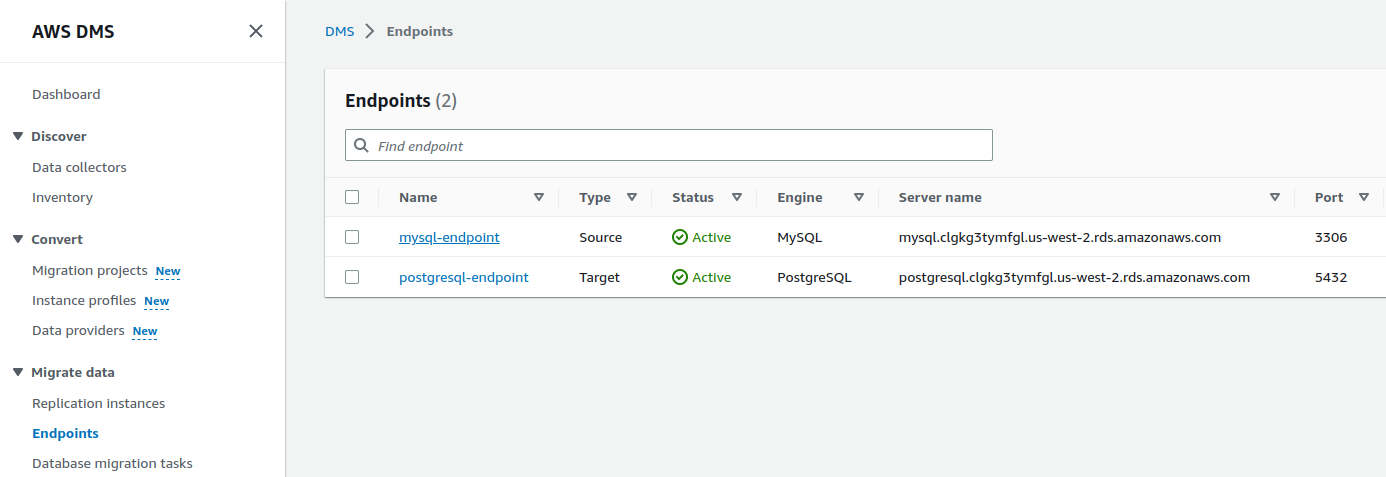
Add AfterConnectScript setting for the target endpoint with a value SET session_replication_role=replica. This will instruct PostgreSQL to ignore foreign key constraints during the data migration.
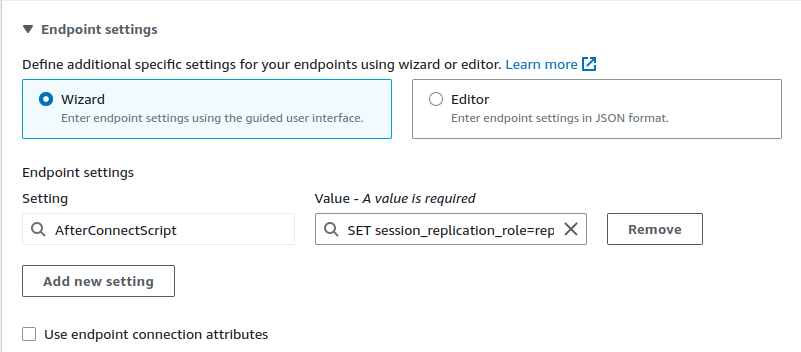
Next, set up a Replication Instance. This is like a special EC2 instance where the migration operation will run. To keep your production maintenance window as short as possible, we recommend a powerful instance such as dms.c5.24xlarge. Note that these instances can be expensive, so don't leave it running unnecessarily.

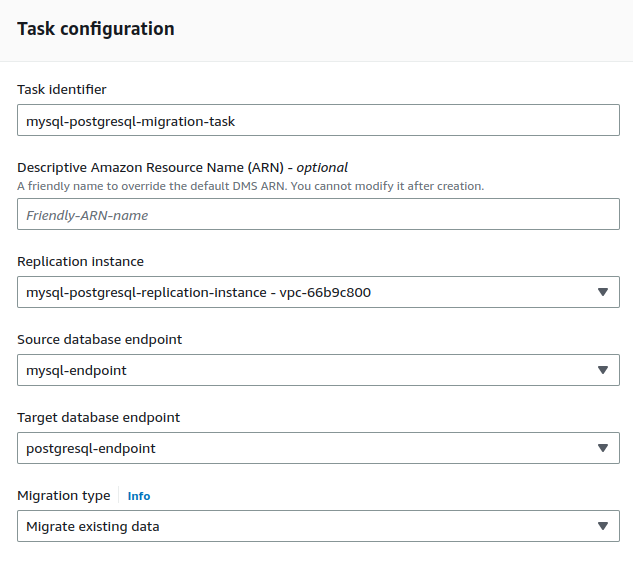
Finally, set up a Database Migration Task. This is where the source endpoint, target endpoint, replication instance, and other migration settings are defined to initiate the process.

The following settings should be defined:
Task configuration
- Task identifier: Specify a unique, understandable name for the task.
- Replication instance: Select the Replication Instance defined earlier.
- Source database endpoint: Select the MySQL database endpoint.
- Target database endpoint: Select the PostgreSQL database endpoint.
- Migration type: Select "Migrate existing data".
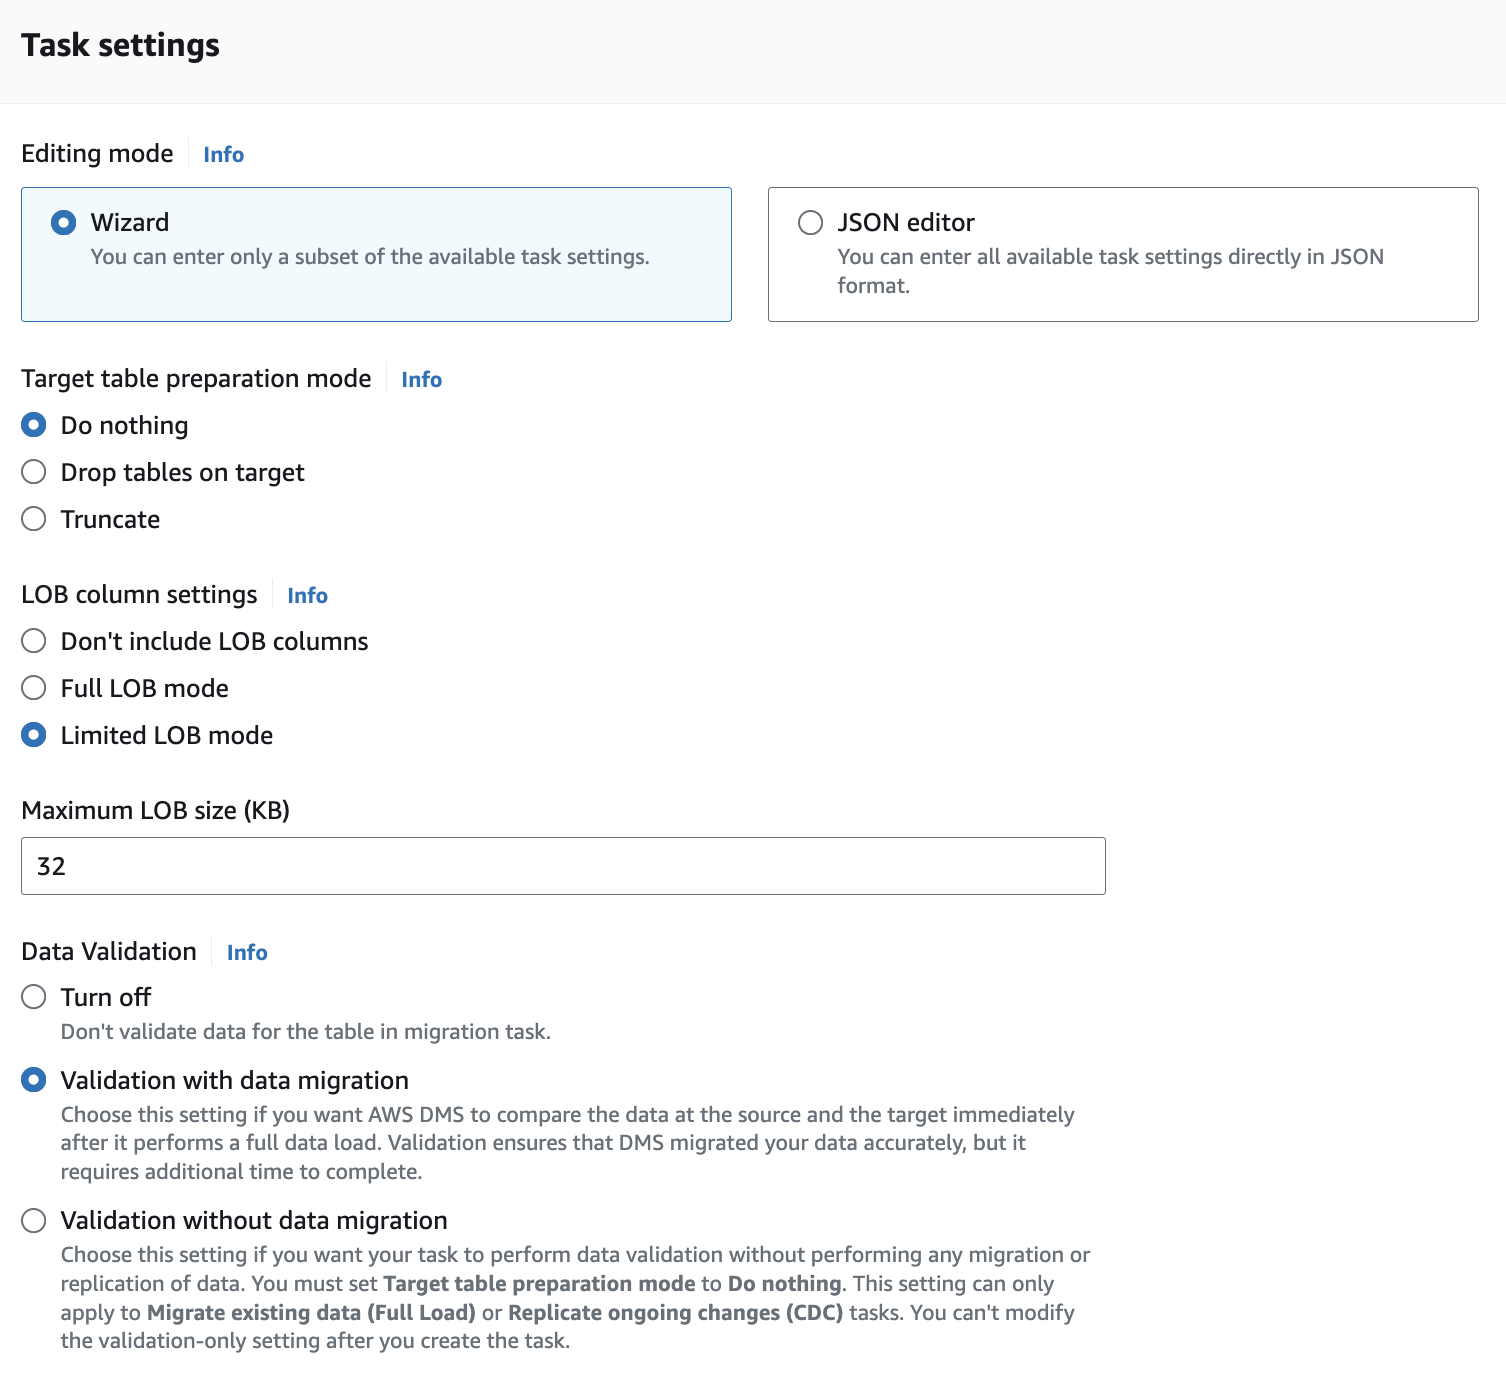
Task settings
- Target table preparation mode: Select "Do nothing".
- LOB column settings: Select "Limited LOB mode".
- Data Validation: Select "Validation with data migration".
Full load tuning settings (Advanced task settings)
- Maximum number of tables to load in parallel: Set this to "48".
- Transaction consistency timeout (seconds): Set this to at least "600".
- Commit rate during full load: Set this to "50000" (the max value).

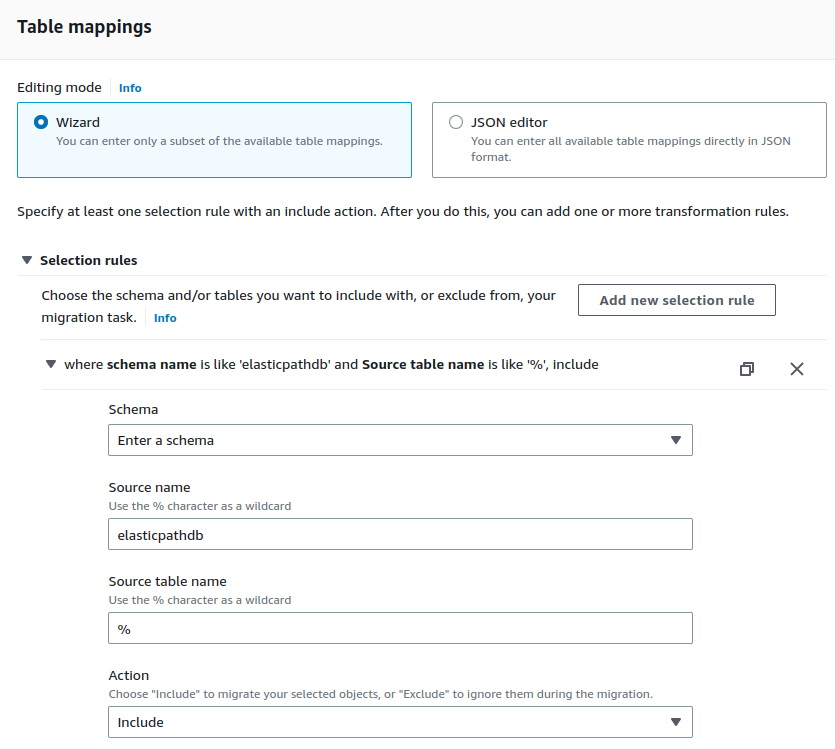
Then you need to set up selection and transformation rules in the Table mappings section. Make sure to specify selection rules as follows:
Selection rule 1
- Schema: Select "Enter a schema"
- Source name: Enter "elasticpathdb" (or a different value depending on the schema name of your MySQL database).
- Source table name: Enter "%".
- Action: Select "Include"
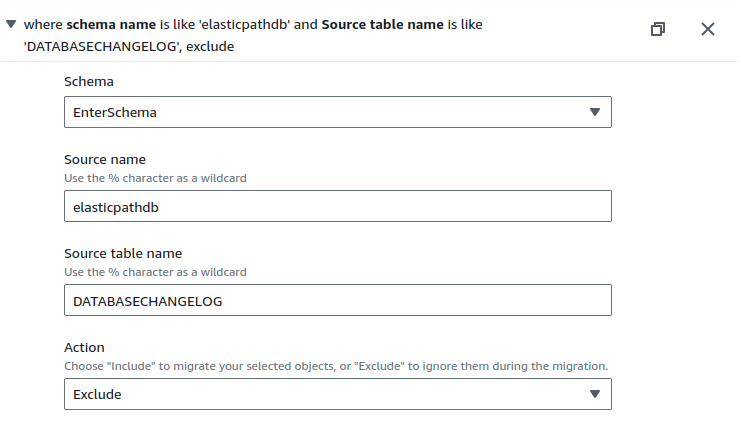
Selection rule 2
- Schema: Select "Enter a schema"
- Source name: Enter "elasticpathdb" (or a different value depending on the schema name of your MySQL database).
- Source table name: Enter "DATABASECHANGELOG".
- Action: Select "Exclude"
Make sure to also specify three transformation rules:
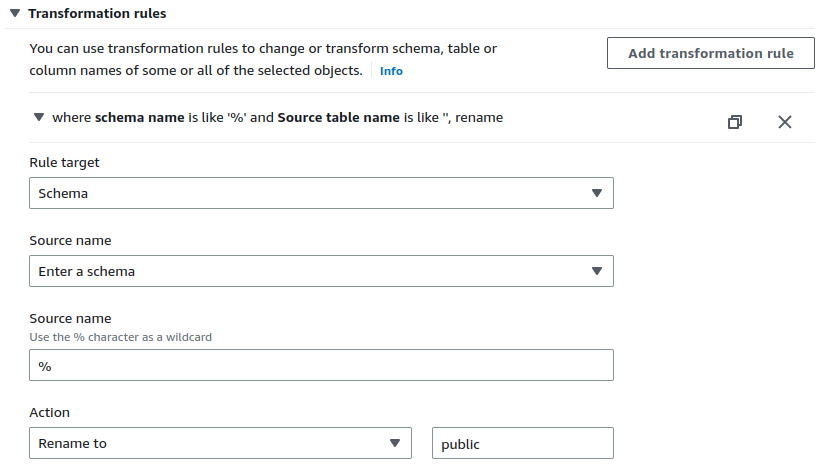
Transformation rule 1
- Rule target: Select "schema".
- Source name: Select "Enter a schema"
- Source name: Enter "%"
- Action: Select "Rename to" and enter the value "public".
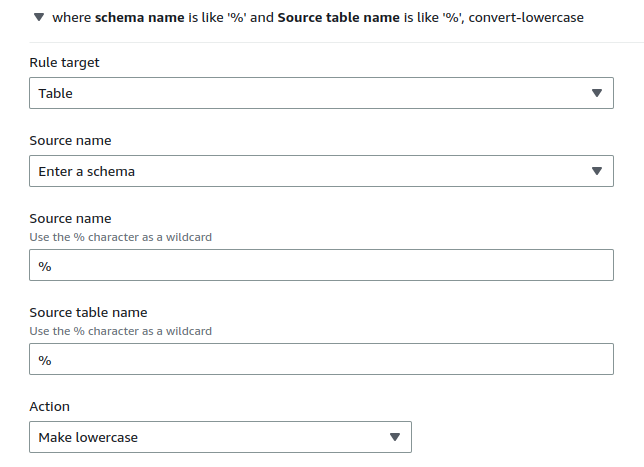
Transformation rule 2
- Rule target: Select "Table".
- Source name: Select "Enter a schema"
- Source name: Enter "%"
- Source table name: Enter "%"
- Action: Select "Make lowercase"
Transformation rule 3
- Rule target: Select "Column".
- Source name: Select "Enter a schema"
- Source name: Enter "%"
- Column name: Enter "%"
- Action: Select "Make lowercase"
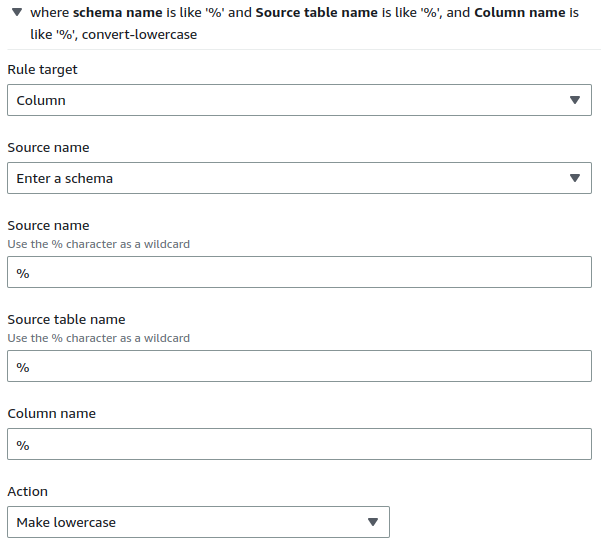
Then click "Create Task" to complete the wizard. The replication process will start immediately.
Open the database migration task and check the "Table statistics" tab. Look at the "Validation state" column and wait for all tables to reach the "Validated" or "No primary key" state. Note: You can ignore any "Mismatched records" errors that appear in the "BATCH_*" tables.
Remember to shut down the Replication Instance when the replication process is complete.
Testing and Production Switchover
The steps above will need to be done for each environment with an existing MySQL database (i.e. staging author, staging live, prod author, prod live, etc). For all environments except prod live, simply follow the steps in sequence. For prod live, you can follow steps 1-3 ahead of your go-live date, but make sure not to make any schema changes to the database after these are completed. Step 4 must be done during a maintenance window, while all Elastic Path Services are shut down or at least not taking traffic. Once the migration is complete, update the context.xml files for your Elastic Path Services to use the new PostgreSQL database.
Make sure to test these steps on actual production data in advance of your go-live date. This will also allow you to estimate the duration of your maintenance window. Test the Elastic Path Services on the PostgreSQL database with your production data to ensure that the data migrated correctly before your go-live date.
