The Helix Development Process
The Helix Development Process
This document outlines the overall process of developing a resource in the Helix programming model, as well as the tools available for working with resources. It is intended as an overview of the process. For more in depth information on developing a specific type of resource, see the Tutorials and the Helix Pattern Library.
Creating a Helix API
The Helix Programming Model Workflow
The Helix workflow consists of three parts: defining your resources, their relationships, and more in XML, using Maven to generate empty prototype classes, interfaces, and the wiring between them, and finally implementing the prototypes in Java.
The API Project
Create the API project in the cortex/resources-api directory. Your project should have a pom.xml and an api.xml file. These are used to generate the interfaces under the target directory.
Parent pom.xml with the resources-api-parent artifact ID:
      <parent>
        <groupId>com.elasticpath.extensions.rest</groupId>
        <artifactId>resources-api-parent</artifactId>
        <version>0-SNAPSHOT</version>
      </parent>
And inclide the api-generator-maven-plugin artifact ID in pom.xml as well:
      <plugin>
        <groupId>com.elasticpath.rest.definitions</groupId>
        <artifactId>api-generator-maven-plugin</artifactId>
      </plugin>
The api.xml file should be located at src/main/resources/META-INF/rest-definitions/api.xml.
Defining the API
Next, define your API in api.xml using the API definition language. Here, you model the REST endpoints and the relationships between them by defining the family names, resources, forms, entities, and relationships.
For detailed information, see API Definition.
Generating the API
Once you've defined your APIs in api.xml, use Maven to generate the API itself. The generated API consists of .java source and .class files as well as interfaces to implement.
To generate the API, run the following Maven command:
mvn clean install
This generates the following:
- Class files in target/com/elasticpath/rest/definitions/ and .java source files for reference in target/generated-sources/api-generator/com/elasticpath/rest/definitions/.
- Resource interfaces which extend EntityResourceDefinition. Resource interfaces specify the operations to be implemented by the prototype classes.
- Relationship interfaces which extend RelationshipDefinition. These Relationship interfaces specify the LinkTo interface, which the prototype classes will implement.
- An entity interface which extends ResourceEntity, as well as an Identifier interface which extends ResourceIdentifier. The prototype classes inject these in as fields in order to access the Entity and Identifier properties.
Creating a Resource Prototype
Resource prototypes are generated Java classes which implement the resources defined by the API definition. They perform particular operations by instantiating and routing logic for CRUD and other API operations, including create, read, update, delete, submit, info and linkto. For more information see Resource Prototypes.
The Resource Prototype Project
The prototype projects must live under cortex/helix-resources. The Helix resource prototype project must include a Maven pom.xml file. It also must have a Maven dependency on the Helix resource API created in the resource-api folder.
The Prototype project should have 4 packages:
- permissions, which contains the PermissionParameterStrategy class.
- prototype, which contains the operation prototypes for EntityResourceDefinition as defined in the API.
- relationship, which contains the classes implementing the RelationshipDefinition interfaces from the API.
- and wiring which contains the ServiceWiring class.
Implementing a Prototype
Prototype classes need to implement the interfaces generated from resource-api.
For more information on implementing prototypes, see Resource Prototypes.
For more information on configuring prototypes, their permissions, and more see Configuring Prototypes.
Adding a Helix Repository
Helix repositories are responsible for interacting with Commerce Engine. In order to be added to RepositoryRegistry, your repository classes must implement the Repository< E extends ResourceEntity, I extends ResourceIdentifier> interface. Your class will also need to be annotated with the @Component annotation.
Running a Helix Prototype
Starting the Cortex Webapp
The Cortex webapp consists of three applications: Cortex Server, Cortex Studio and the Apache Felix Console. These allow you to test your resource configurations, examine the JSON responses, and troubleshoot resource loading errors.
To launch the Cortex webapp, navigate to the /cortex/ext-cortex-webapp/ directory. Then, run the following command:
mvn clean tomcat7:run-war
This cleans out the existing target directory, starts up a tomcat7 server, and deploys the Cortex Server, Studio, and Felix webapps to the following locations:
- Cortex Server deploys to http://localhost:9080/cortex
- Cortex Studio deploys to http://localhost:9080/studio
- The Felix Console deploys to http://localhost:9080/cortex/system/console/bundles
Debugging Cortex
There are numerous reasons why Cortex may fail to start up. This section can help you address and debug start up issues.
Starting the Cortex Webapp in debug mode
To debug prototype code, you can start up the Cortex webapp in debug mode, and attach your debugger to the running process.
To start the webapp in debug mode, use mvnDebug instead of mvn in the webapp folder.
mvnDebug tomcat7:run-war
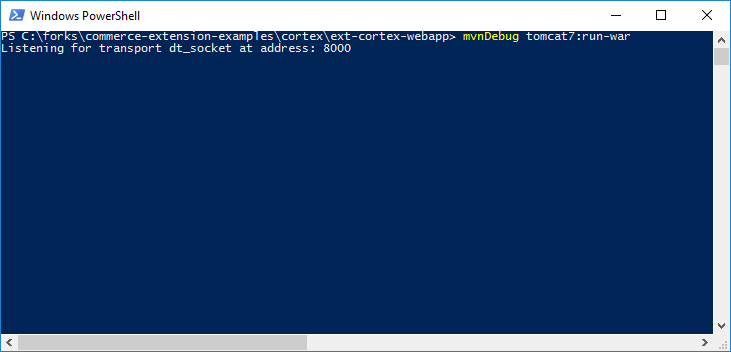
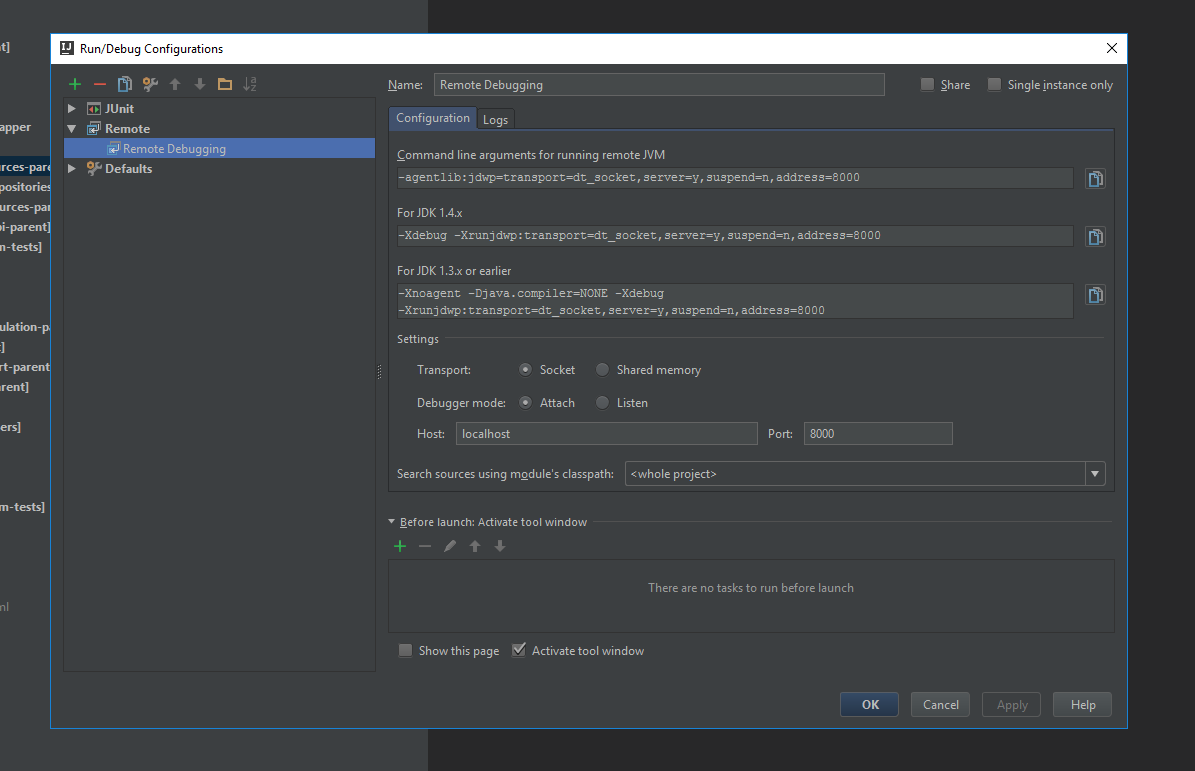
When you start the Cortex webapp in debug mode, the console output provides a listening port. You can use this port to attach IDEA's remote debugging to Cortex.
JMX Console
In order to access Cortex with a JMX console, update your system's environment variables and add the following:
MAVEN_JMX=-Dcom.sun.management.jmxremote -Dcom.sun.management.jmxremote.port=6969 -Dcom.sun.management.jmxremote.ssl=false -Dcom.sun.management .jmxremote.authenticate=false
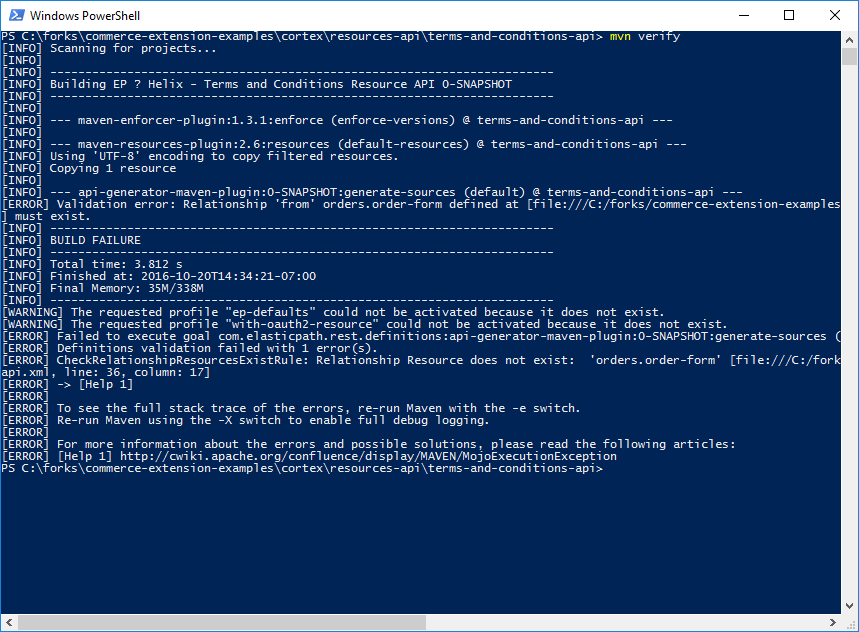
Module Validation
The verification phase of the Maven life cycle validates resources, APIs and prototypes. Maven validates the api.xml file in your resource's API as well as prototype identifiers and entities to ensure that the resources they point to exist. Errors can occur when maven finds an invalid identifier in your XML.
If you see errors similar to the following, you may need to check your module's validation.
Apache Felix Console
The Apache Felix Web Console allows developers to interact with installed bundles. There are number of subsections specific to Cortex resources that can help you understand any errors you might be receiving.
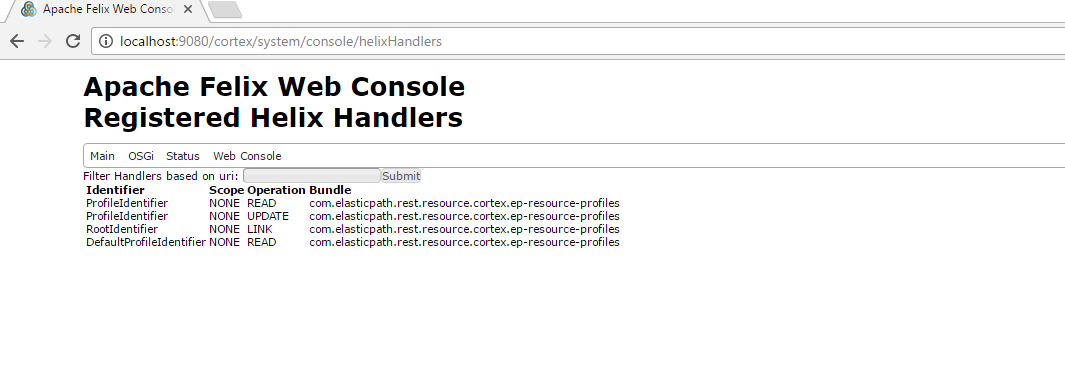
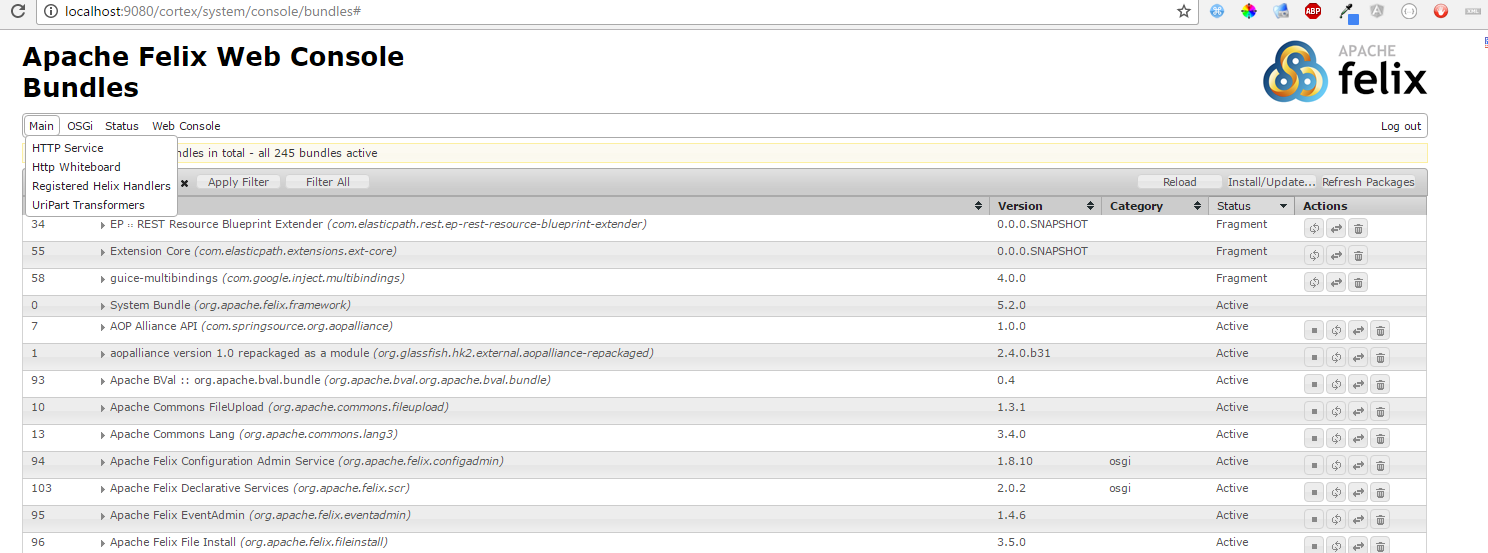
Registered Helix Handlers
The Registered Helix Handlers page of the Apache Felix Console (Main > Registered Helix Handlers) allows you to see all the ResourceIdentifiers registered with the Helix runtime.
This page lists all registered ResourceIdentifiers, any operations that are associated with the identifier, the identifier's associated scope, and its the associated Bundle. It also shows which HTTP operation the prototype is registered against.
If you are unable to access your new resource after deployment, check this page, and ensure that the identifier and bundle are listed.
Bundles
The Bundles page of the Apache Felix Console lists the Installed, Active, Registered, and Fragment bundles for the running Cortex and Helix Runtimes. You can use this page to install and start new bundles, as well as stop running bundles.
Debugging Bundles
The Felix Web Console Bundles page can be used to address whether or not you've registered your bundles correctly. You can find the Bundles page at http:[server]:[port]/cortex/system/console/bundles.
Before using the Bundles page, ensure that the bundle is found by the Helix Runtime/OSGi. If it is not found, it will not appear in the list. Properly loaded bundles are listed in the Active or Fragment states. If your bundle is not in either of these states, it had issues starting up.
To investigate a bundle's status further, click the bundle's row in the table. This shows a detailed status for the bundle. In particular, the Import-Package section lists which bundles cannot be resolved and may assist in understanding why a package didn't register correctly.
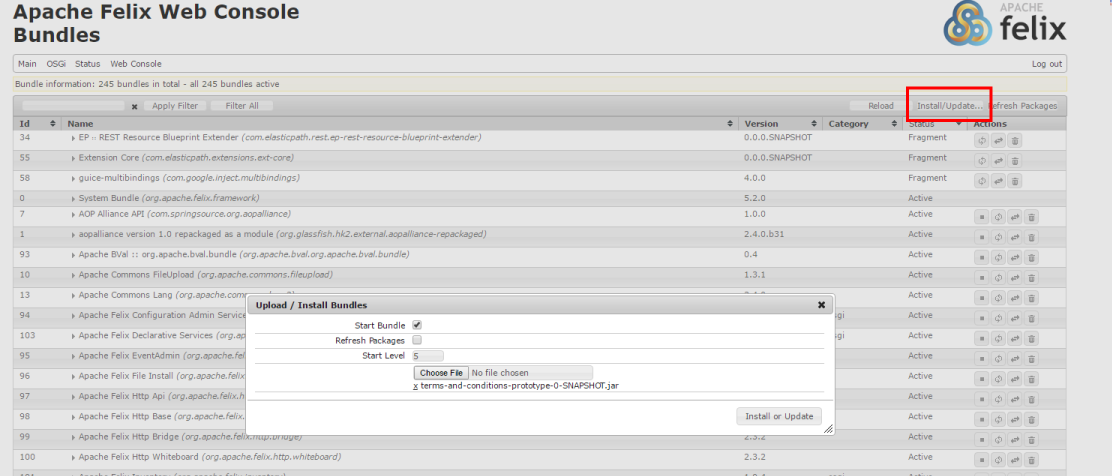
Hot Deploying Bundles
The Bundle page's The Install/Update tool allows you to deploy a new bundle without restarting the Cortex Runtime.
To deploy a new bundle, click Install/Update, and select the .jar file for the bundle (typically in cortex/resource-api/ or cortex/resources/ in the target/ folder of the resource). Then, check the Refresh Packages check box to initiate bundle rewiring.
You can also use the following command to deploy bundles:
mvn clean install -Pfelix-deploy