Deploying a Single Instance Development Environment
Overview
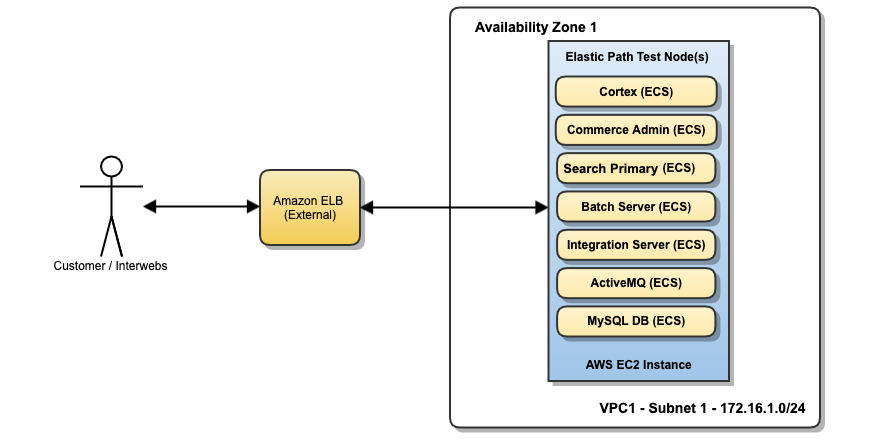
The following diagram shows the structure of a single instance development environment:
Prerequisites
Before deploying a single-instance development environment, there are several Jenkins job that must be run first. These jobs build necessary Docker images and push them to the AWS (Amazon Web Services) Elastic Container Registry (ECR).
All of these jobs are run by the InitPipeline job during CloudDeploy initialization. For more information about what the jobs build, see the Building Elastic Path Commerce Docker Images with CloudDeploy section.
Deployment Process
About This Task
The DeploySingleInstance Jenkins job deploys an EC2 instance in a private subnet created by CloudCore. This job is located in the Jenkins job folder CloudDeploy, in the Jenkins view Deployments.
Procedure
Confirm that the prerequisites are met.
Run the
DeploySingleInstancejob. The job performs the following steps before deploying the environment:- The default values for the job parameters are populated from the Consul config store
- CloudFormation templates used in a single instance environment are uploaded into the Amazon S3 bucket
ep-cloudops-<account_id>/CloudDeploy/<Branch>/<StackName>
For more information about the parameters, see
DeploySingleInstanceJenkins job.Monitor the deployment progress in the AWS CloudFormation console.
The environment takes approximately 20 minutes to create the necessary CloudFormation stacks. When the root CloudFormation stack completes successfully, the stack’s outputs display useful information such as endpoints to the Elastic Path services and the AWS CloudWatch LogGroup name where logs can be found.
Note: The endpoints will only work after DNS settings are updated. This is usually done after initializing CloudCore. For more information, see CloudCore DNS Configuration.
Validate the deployment. For instructions, see Validating a Single Instance Deployment section below
Validating Single Instance Deployment
This section outlines how to verify successful single-instance deployments.

These checks are done after running the DeploySingleInstance Jenkins job and a single instance developer environment is created.
Endpoints and credentials used to access services are located on the Default CloudOps Endpoints and Credentials page.
Target Group health check
Check the health of each Target Group as follows:
Open the AWS EC2 Console and click Target Groups.
Confirm the presence of 5 target groups prefixed by
EP-Si-Targe.As shown in the following screenshot, select the Health checks tab and check the Path to find the app the target group points to.
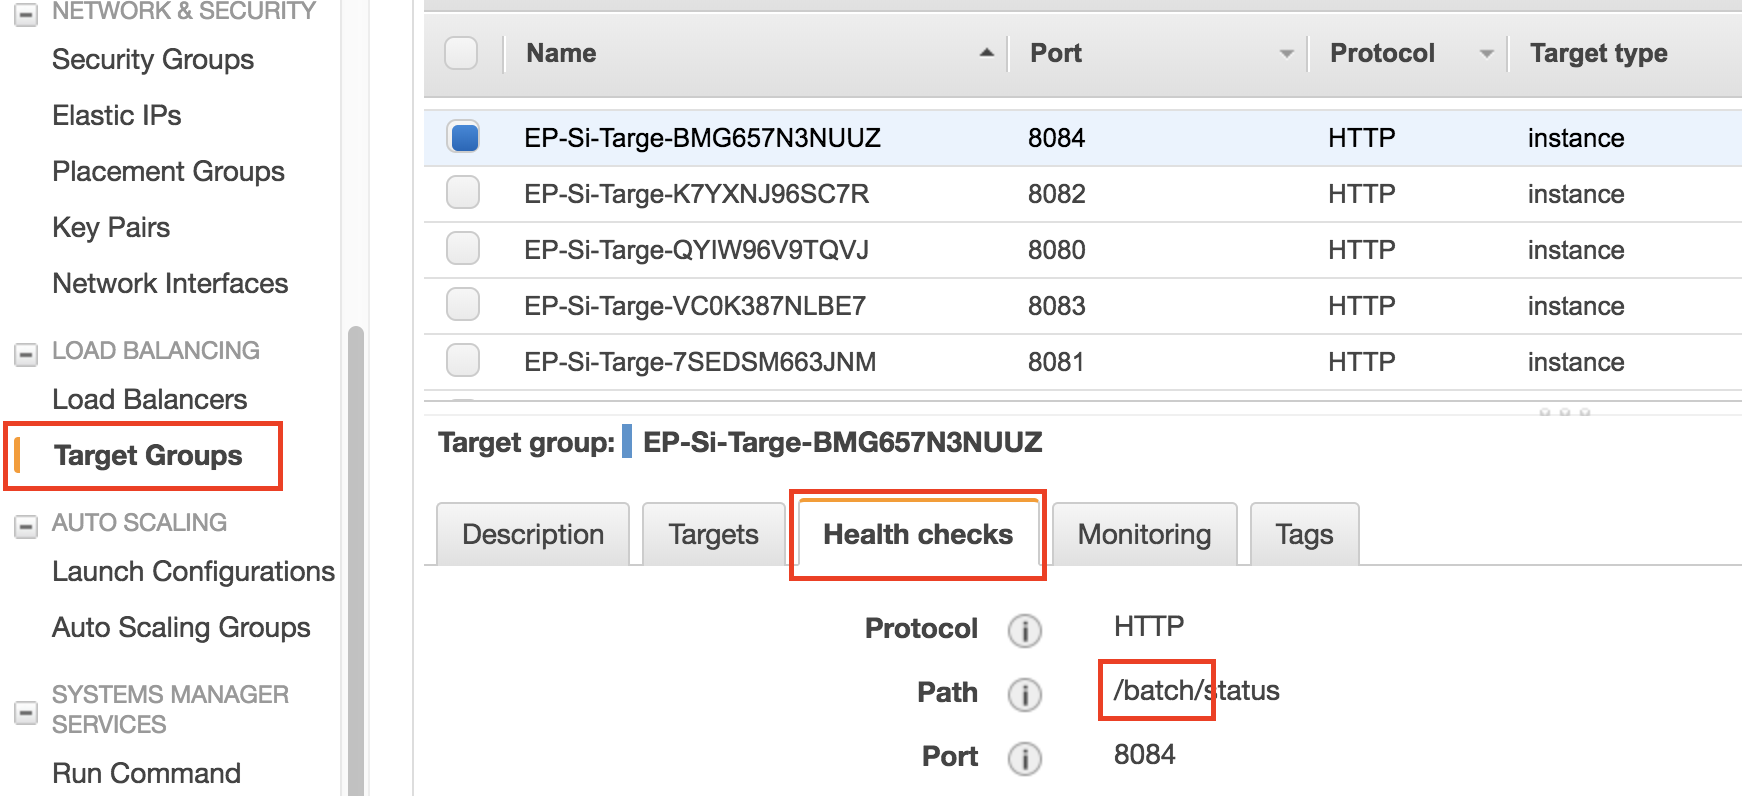
- Each target group should point to one of the 5 apps:
cmintegrationcortexbatchsearch
Go to the Monitoring tab (on the same panel as the Health checks tab) and ensure that the number of instances on the Healthy Hosts graph is correct
ActiveMQ transaction check
The following steps are to verify that Elastic Path Commerce is able to process transactions.
Connect to the ActiveMQ admin tool
Go to the ActiveMQ admin tool.
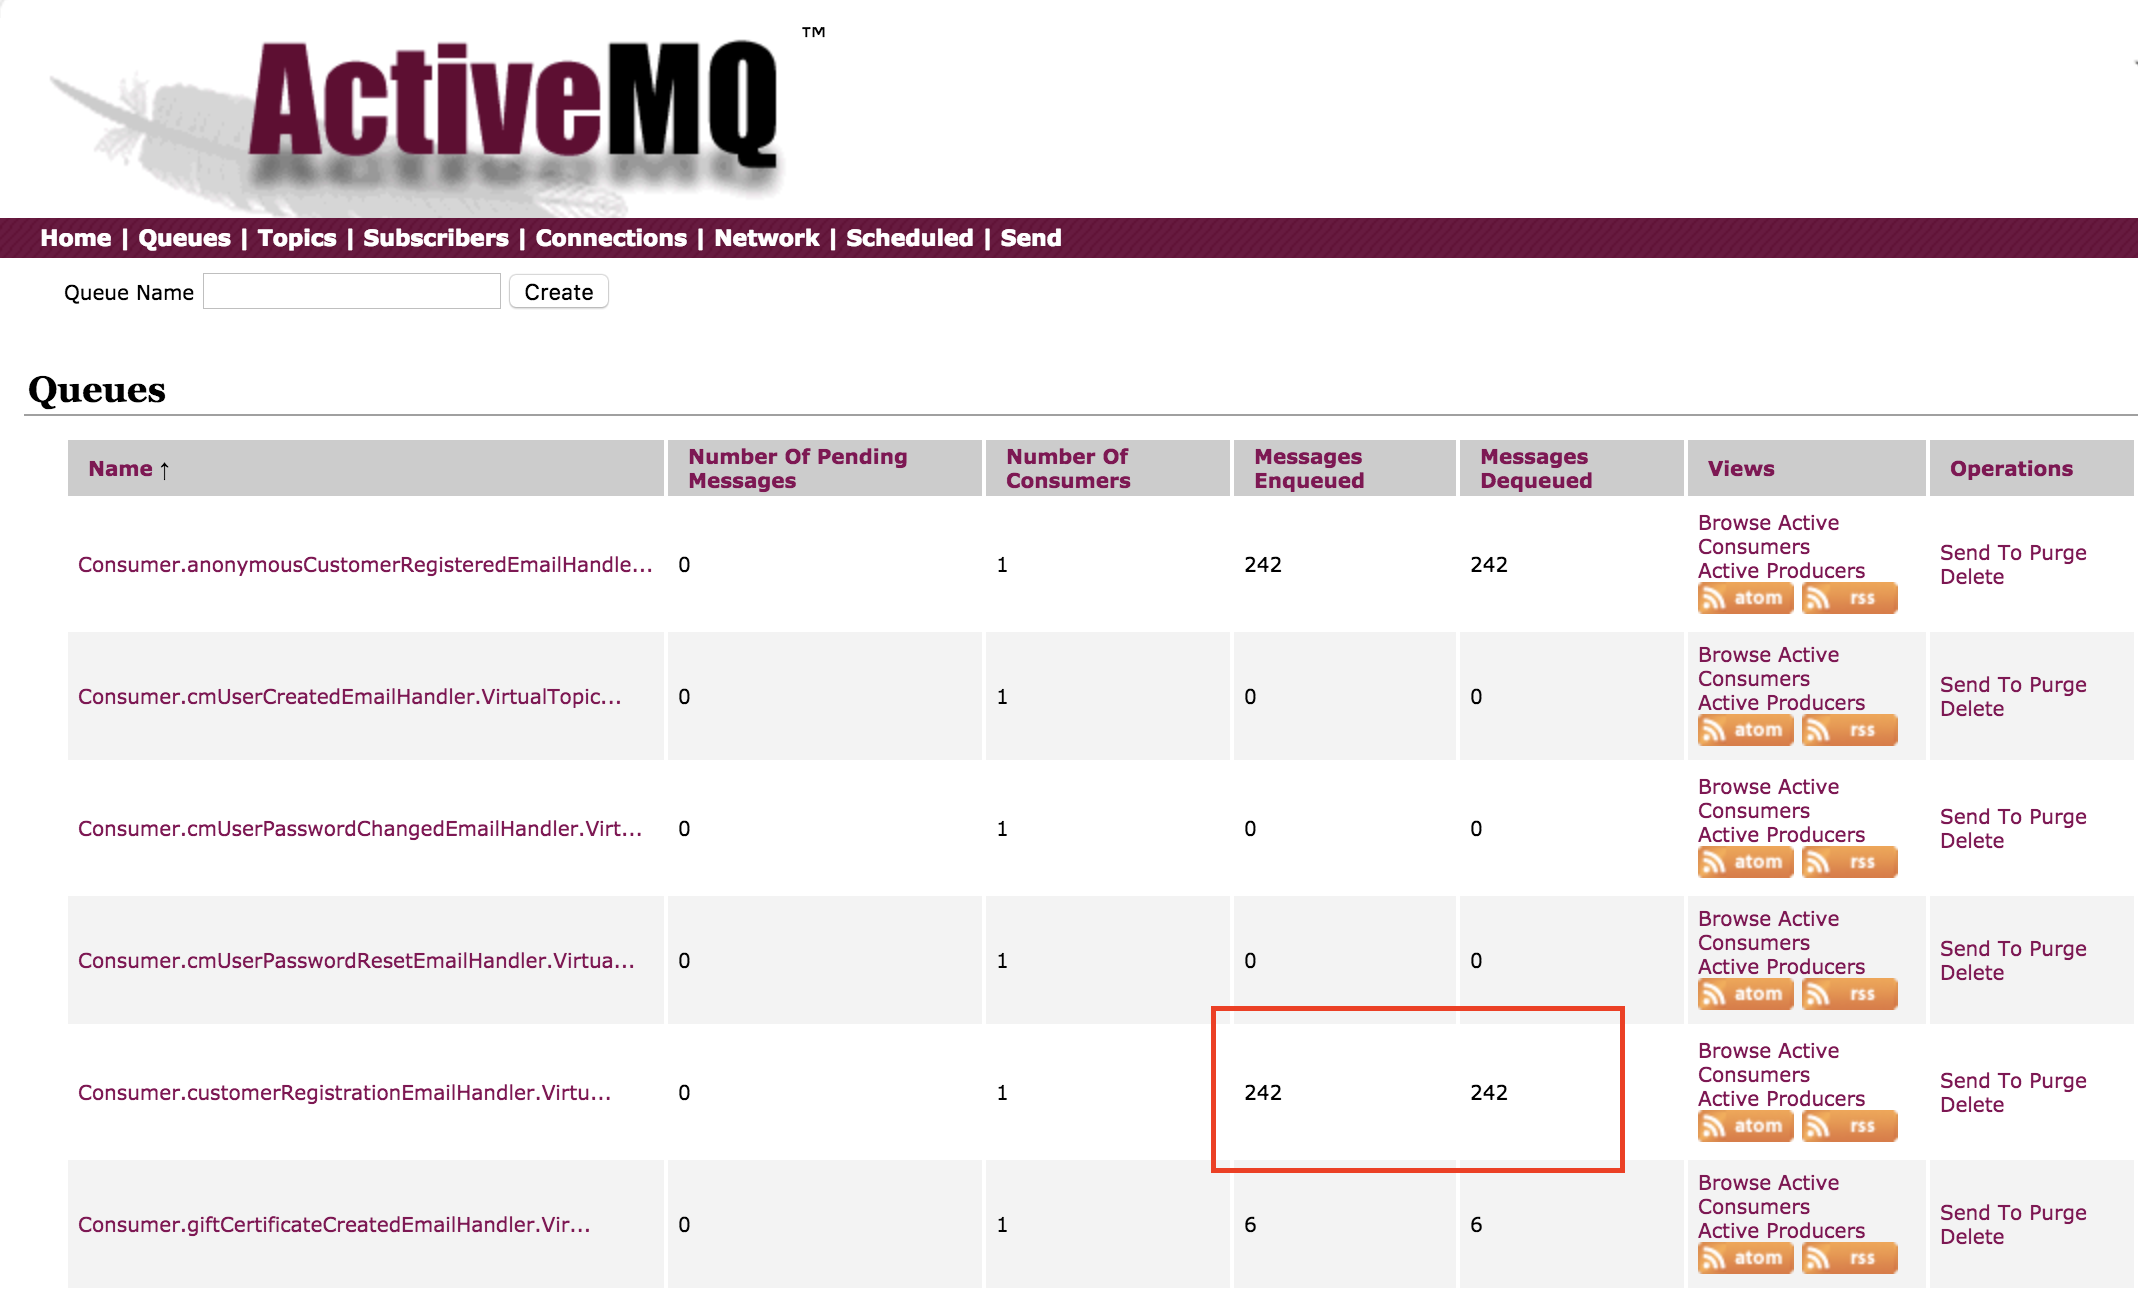
Click the queues tab, and note the values in the columns Messages Enqueued and Messages Dequeued from the row queue named Consumer.consumerRegistrationEmailHandler.VirtualTopic.ep.customers
Register a new user in Cortex
- In Cortex Studio Authenticate yourself as a public user
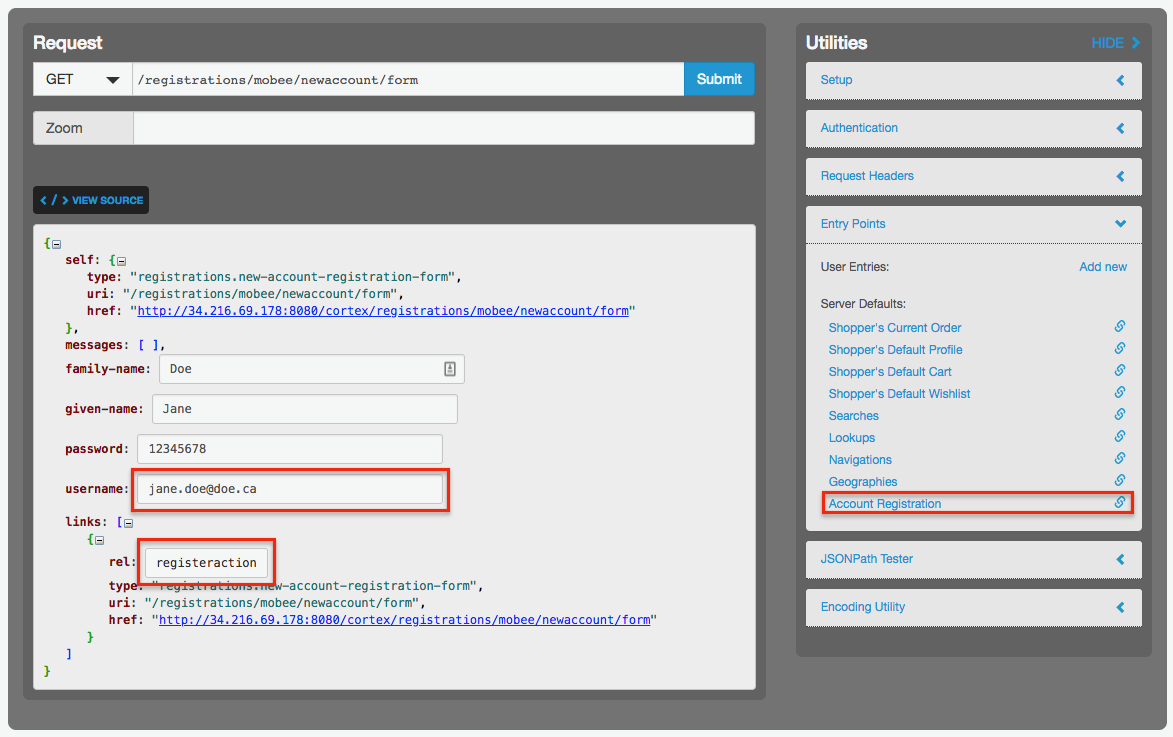
- In the Account Registration section, enter the following information as shown in the following screenshot, then click registeraction:
- family-name
- given-name
- password
- username
- In the ActiveMQ admin tool (refer to Figure 3. ActiveMQ email queue), in the columns Messages Enqueued and Messages Dequeued in the row queue named Consumer.consumerRegistrationEmailHandler.VirtualTopic.ep.customers,confirm that values have been incremented
Search check
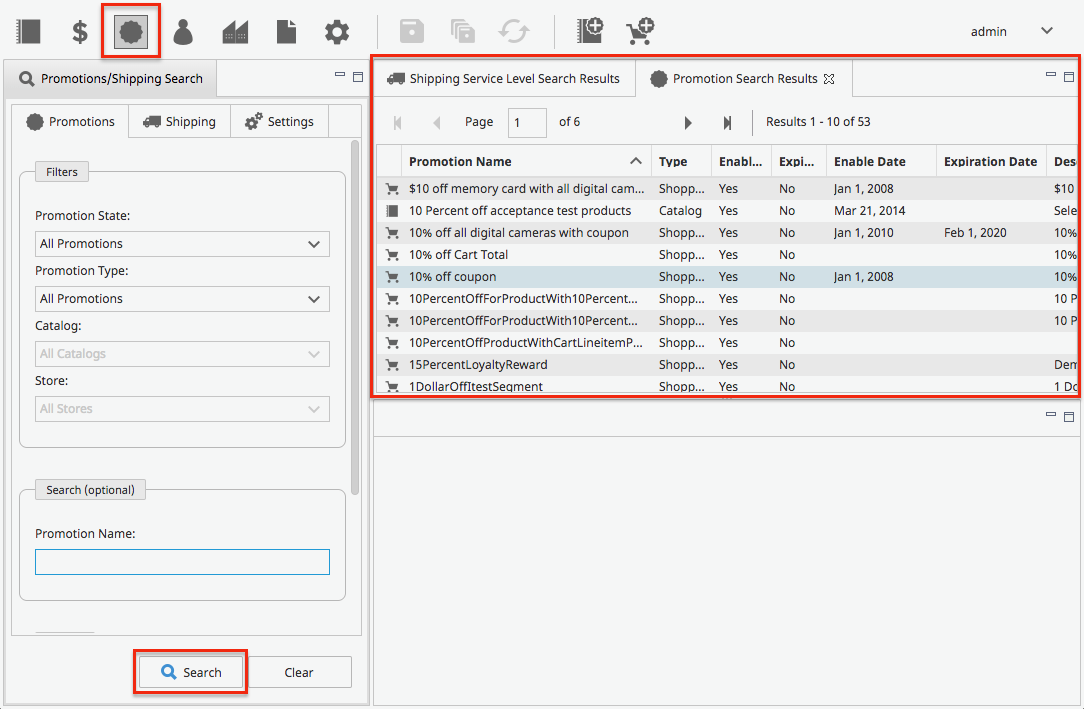
Searching for promotions and shipping items
Log in to the Commerce Manager as the administrator.
In the Promotions/Shipping tab, click Search. Confirm that the search result contains search result items
Reindexing search for an index
Log in to the Commerce Manager as the administrator.
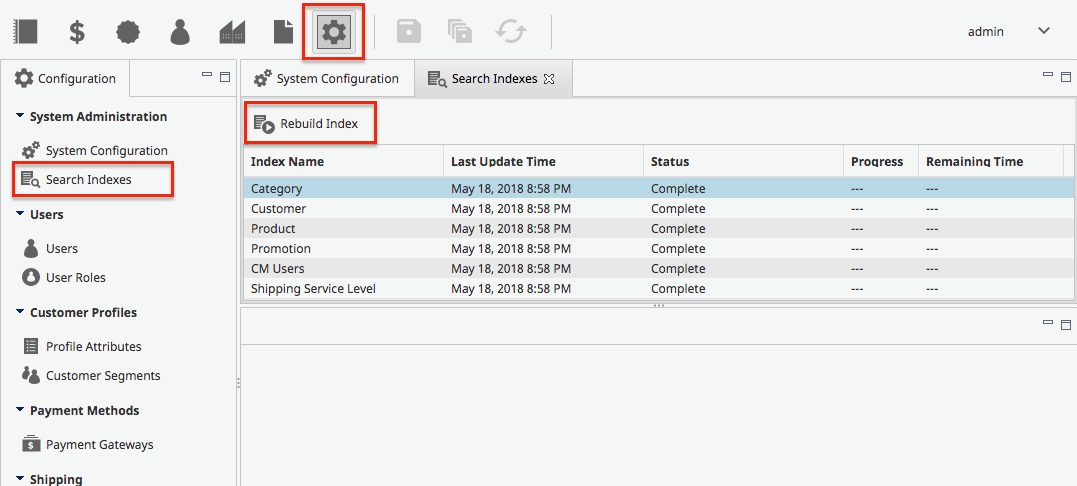
In the Configuration tab, click Search Indexes.
Click Rebuild Index for any index name. Confirm that the status goes from Rebuild Scheduled to Rebuild in Progress to Complete
