Deploying a Single Instance Development Environment
Overview
You can deploy a single instance development environment when the InitPipeline job and its sub-jobs are successfully completed. The InitPipeline job pushes Docker images required for deployment into the Elastic Container Registry (ECR) in AWS (Amazon Web Services). The InitPipeline is run as part of the CloudDeploy initialization. For more information on the CloudDeploy initialization, see the CloudDeploy Initialization page.
The following diagram shows the structure of a single instance development environment:
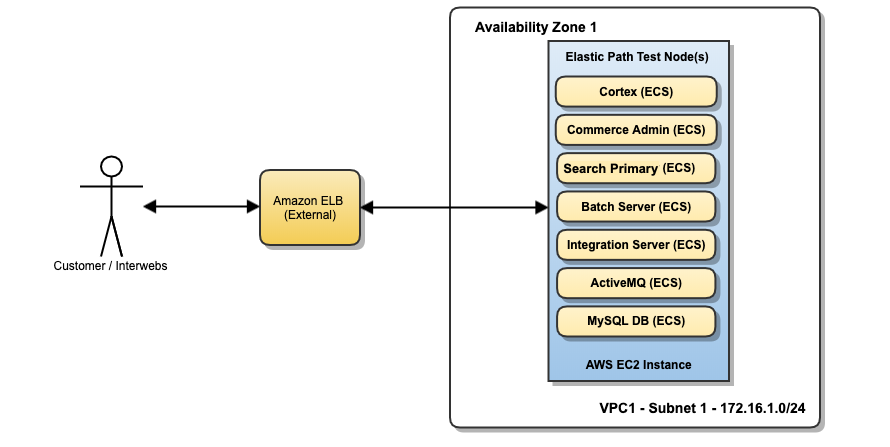
For more information on the single instance environment architecture, see Single Instance Development Environment Architecture.
Procedure
The DeploySingleInstanceDevEnvironment job deploys a development instance in a private subnet created by CloudCore. This job is located in the Jenkins job folder CloudOps, in the Jenkins view Deployments.
Confirm that the InitPipeline job is completed successfully and all required Docker images are in ECR.
Run the
DeploySingleInstanceDevEnvironmentjob. The default values for the parameters are stored in the Consul server that is created by CloudCore. For more information on the parameters, seeDeploySingleInstanceDevEnvironmentjob.Monitor the deployment progress in the CloudFormation AWS console. The environment is created in approximately 10 minutes. When the CloudFormation stack completes successfully the stack outputs displays the output that includes information, such as the load-balancer endpoint to the Elastic Path services in the single instance environment. The following is an example output from the AWS CLI:
$ aws cloudformation describe-stacks --stack-name EP-Single-Dev --query 'Stacks[0].Outputs'
[
    {
        "OutputKey": "ElbEndPoint",
        "OutputValue": "dev1.ep-dev.example.epcloudops.com"
    },
    {
        "OutputKey": "ASG",
        "OutputValue": "EP-Single-Instance-Dev-Env-EP-CloudDeploy-master-1-AutoScalingCluster-1B6FYD77F0Y4F-AutoScalingGroup-1LBJ1FCWEAOSU"
    },
    {
        "OutputKey": "Cluster",
        "OutputValue": "EP-Single-Instance-Dev-Env-EP-CloudDeploy-master-1-AutoScalingCluster-1B6FYD77F0Y4F-Cluster-GBQ62PY6ELW7"
    }
]
Note: The ELB (Elastic Load Balancer) endpoint works only if your DNS settings are set up correctly. For more information about DNS settings, see CloudCore DNS Configuration. If DNS is not configured, you must reference the load-balancer’s unique DNS name to access the Elastic Path services on the single instance environment.
Validating Single Instance Deployment
This section outlines how to verify a successful deployment and connection.

These checks are done after running the
DeploySingleInstanceDevEnvironment Jenkins job and a single instance developer environment is created.
Credentials used to log in are located on the following page:
Target Group health check
Check the health of each Target Group as follows:
Open the AWS EC2 Console and click Target Groups.
Confirm the presence of 5 target groups prefixed by
EP-Si-Targe.As shown in the following screenshot, select the Health checks tab and check the Path to find the app the target group points to.
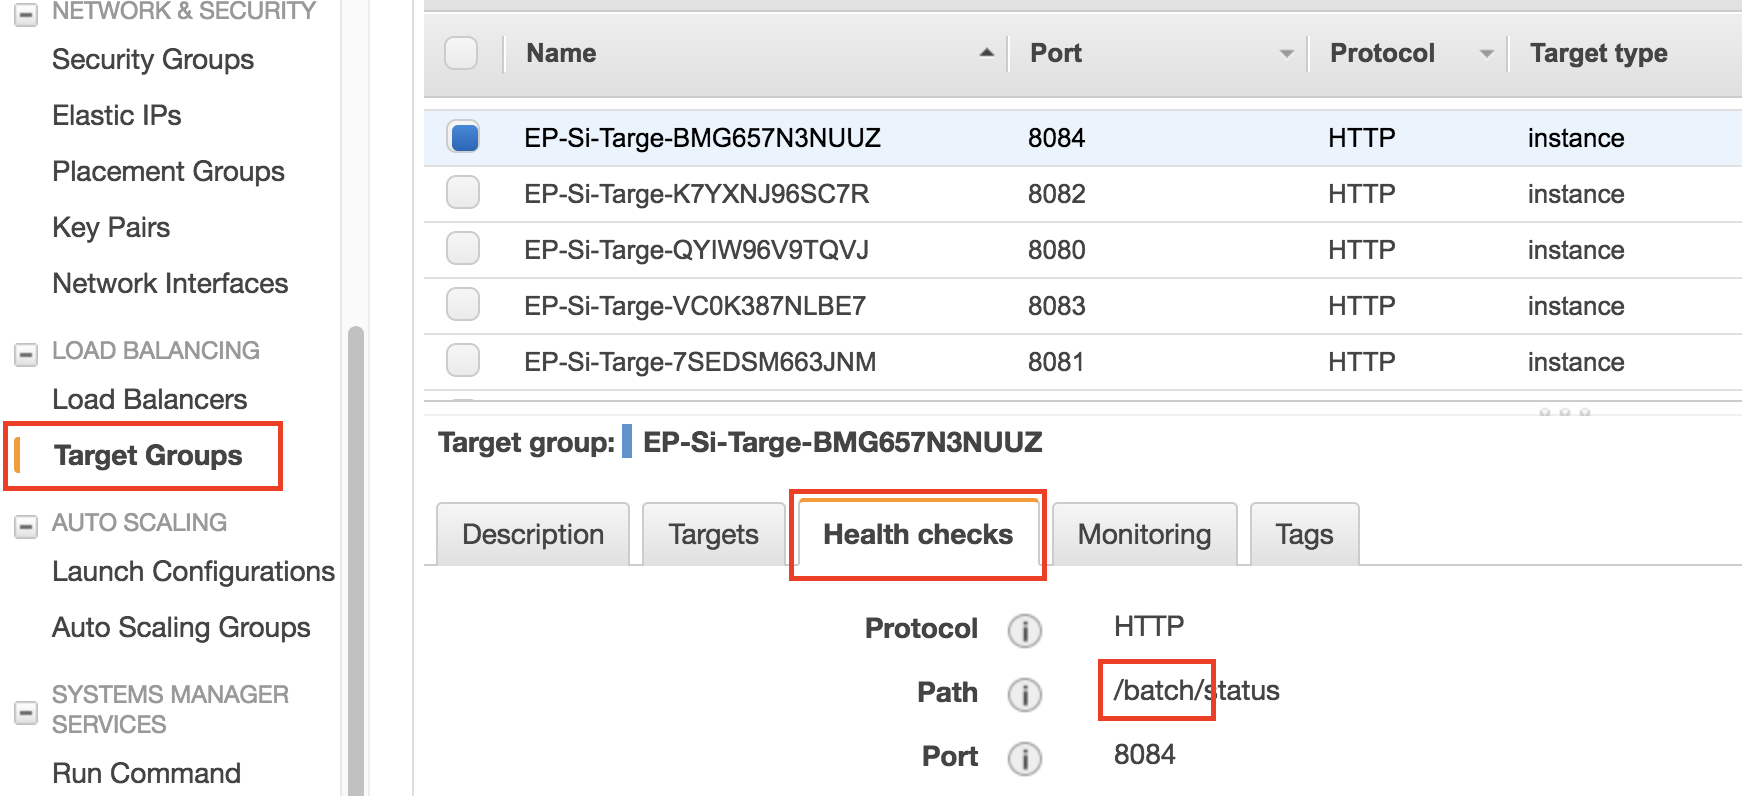
- Each target group should point to one of the 5 apps:
cmintegrationcortexbatchsearch
Go to the Monitoring tab (on the same panel as the Health checks tab) and ensure that the number of instances on the Healthy Hosts graph is correct
ActiveMQ transaction check
The following steps are to verify that Elastic Path Commerce is able to process transactions.
Connect to the ActiveMQ admin tool
- Set up a SSH tunnel through the Bastion server to point your web browser at the ActiveMQ admin tool with the following terminal command:
ssh -i <path-to-bastion-private-key>/<bastion-private-key-name> \
ec2-user@<bastion-public-ip> \
-L <activemq-port>:<si-private-ip>:<activemq-port>
- Log in from an internet browser to:
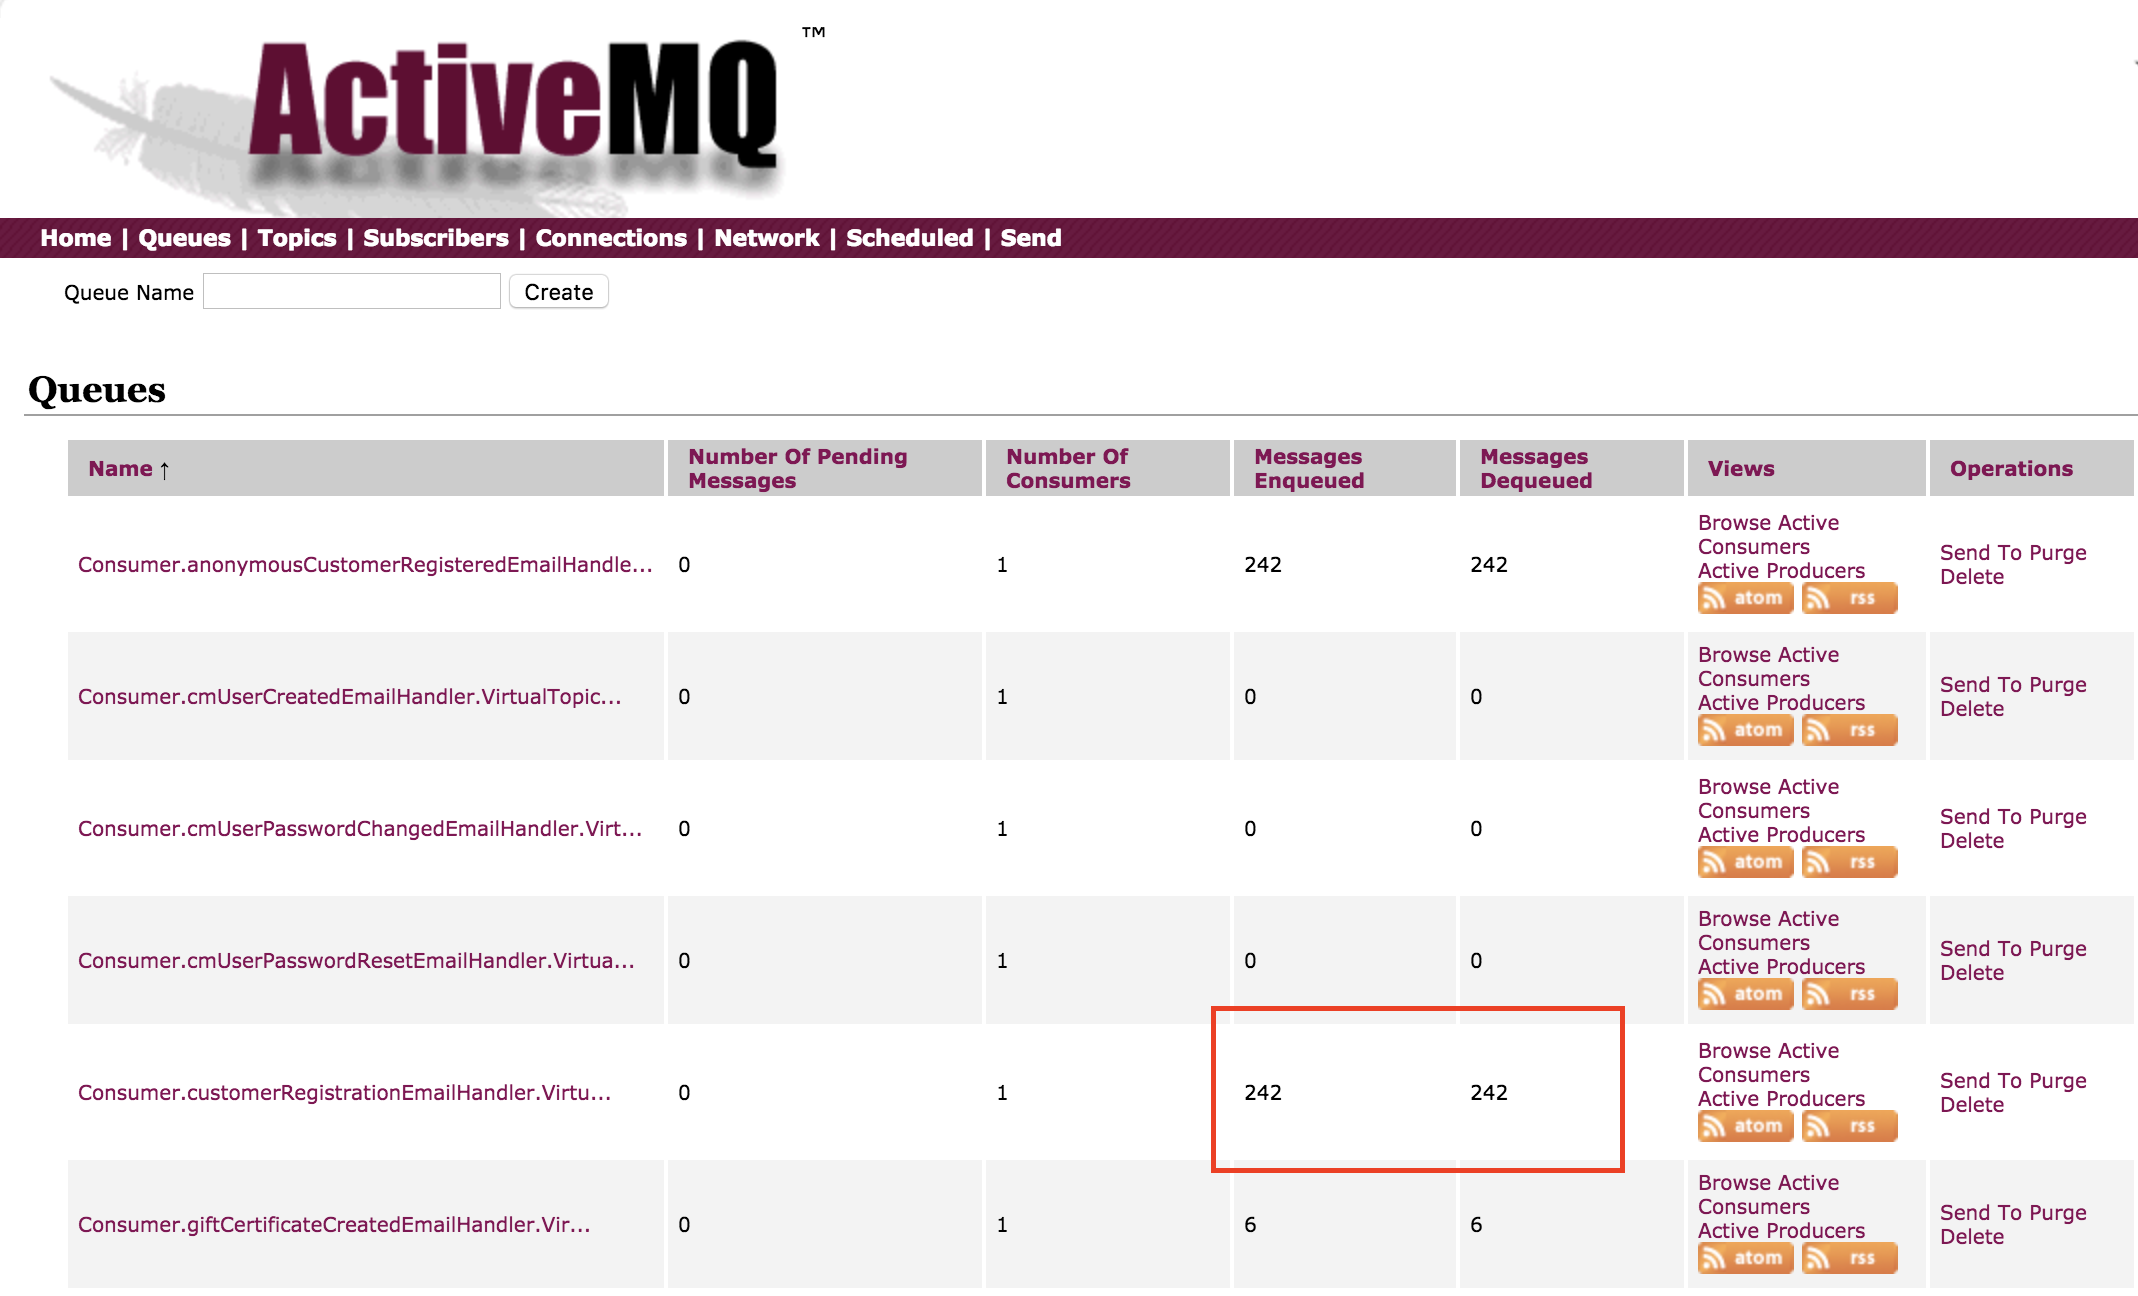
localhost:<activemq-port>/admin\ - Click the queues tab, and note the values in the columns Messages Enqueued and Messages Dequeued from the row queue named Consumer.consumerRegistrationEmailHandler.VirtualTopic.ep.customers
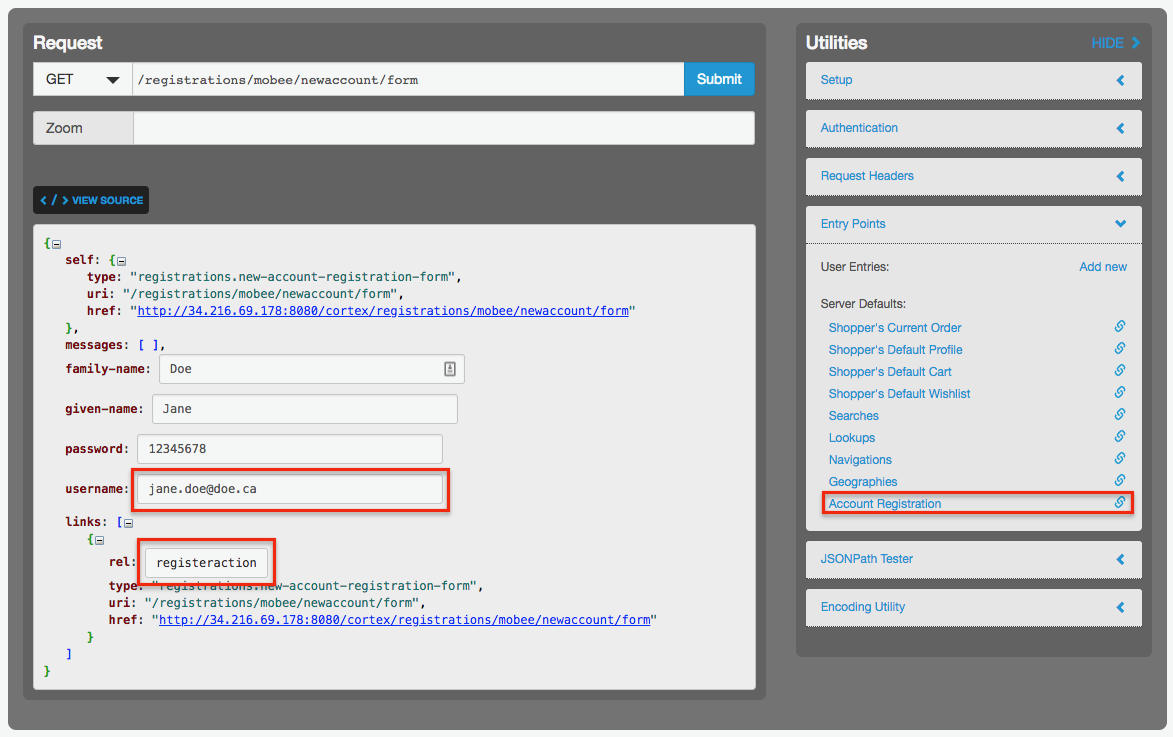
Register a new user in Cortex
- In Cortex Studio Authenticate yourself as a public user
- In the Account Registration section, enter the following information as shown in the following screenshot, then click registeraction:
- family-name
- given-name
- password
- username
- In the ActiveMQ admin tool (refer to Figure 3. ActiveMQ email queue), in the columns Messages Enqueued and Messages Dequeued in the row queue named Consumer.consumerRegistrationEmailHandler.VirtualTopic.ep.customers,confirm that values have been incremented
Search check
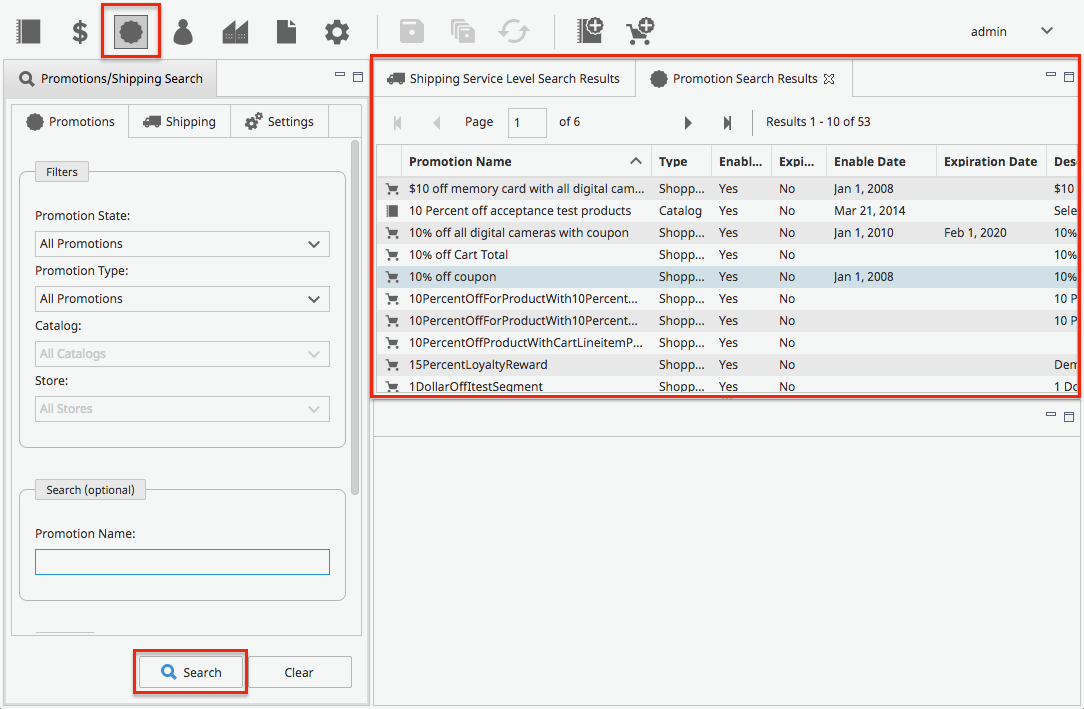
Searching for promotions and shipping items
Log in to the Commerce Manager as the administrator.
In the Promotions/Shipping tab, click Search. Confirm that the search result contains search result items
Reindexing search for an index
Log in to the Commerce Manager as the administrator.
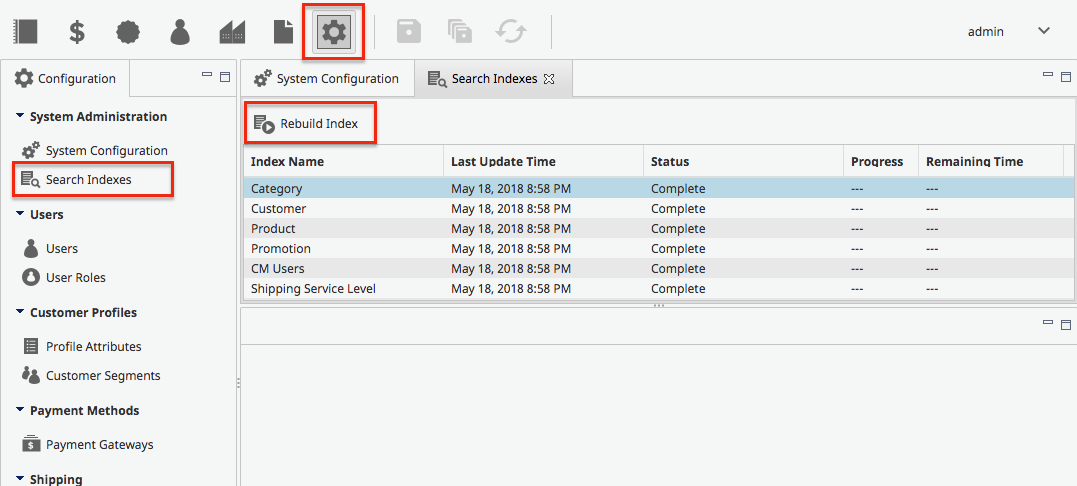
In the Configuration tab, click Search Indexes.
Click Rebuild Index for any index name. Confirm that the status goes from Rebuild Scheduled to Rebuild in Progress to Complete
